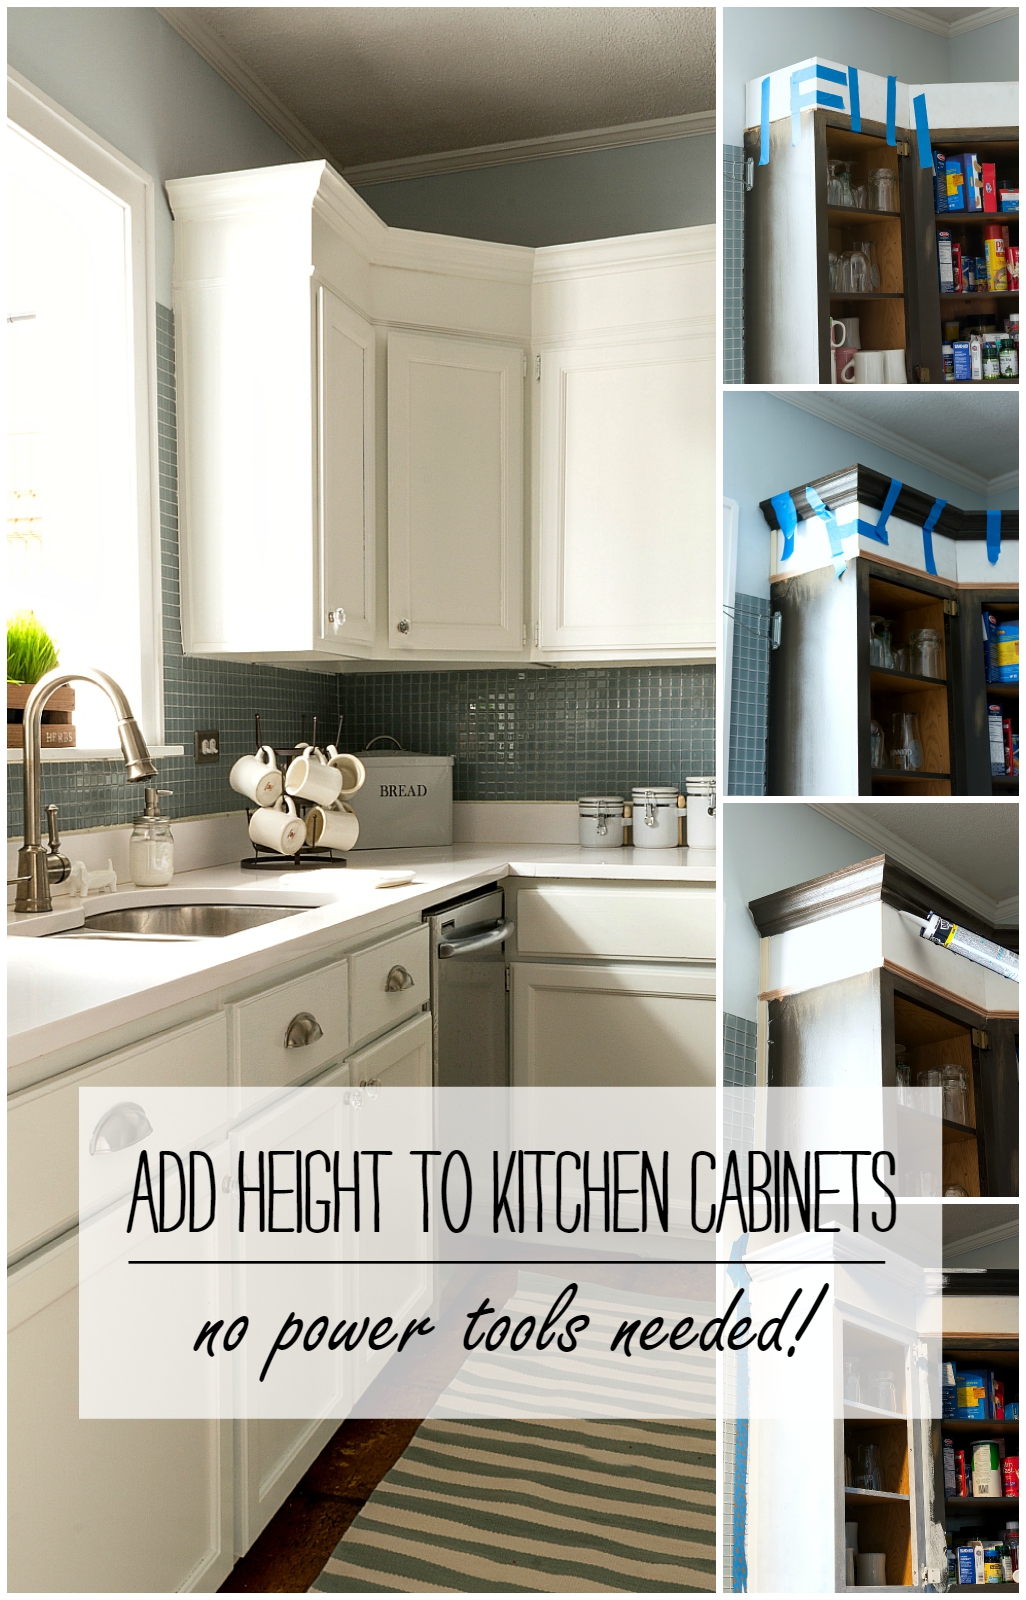
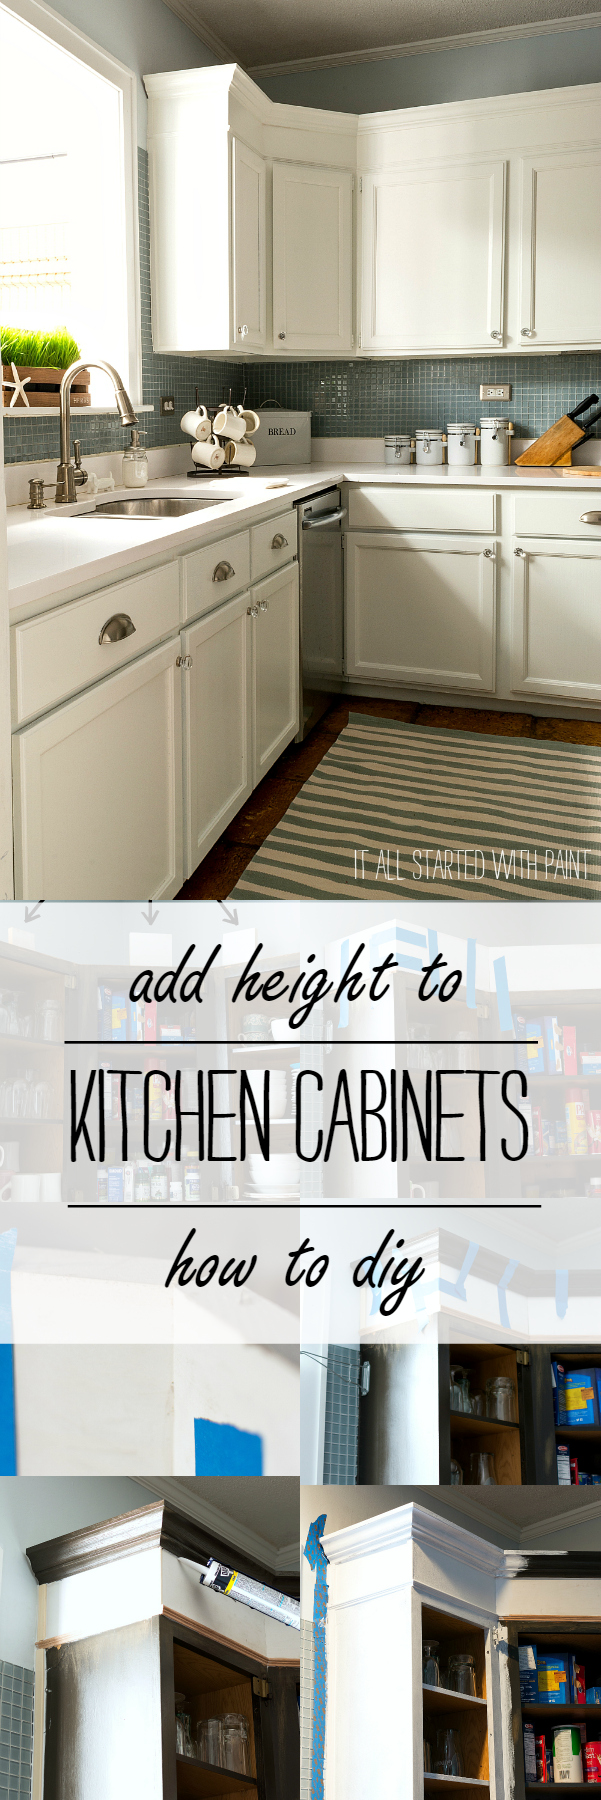
How To Add Height to Kitchen Cabinets – A DIY Tutorial.
 I may have mentioned once or twice — or ten plus times — that I was born and raised in New Jersey. Northern New Jersey, to be specific. In a town filled with malls. In the 60’s and 70’s and 80’s.
And I’ll freely admit I fell victim to the fashion trends of the 60’s and 70’s and 80’s. I sported bell bottoms and culottes and pants suits and crocheted vests and go go boots in the 60’s and 70’s. But the 80’s? Oh the 80’s …
… when everything got bigger. And shinier. And tighter.
Hello Lycra!
And I was in. ALL IN. The hair and the nails doubled in size, while the pieces in my wardrobe grew smaller and tighter.
As I’ve aged, I let go of most of the 60’s and 70’s styles (though I do love a mini dress with a go go boot), but the worst of the 80’s stuck with me. The bigger part, that is. My hair isn’t done unless it has a bit of lift. And hairspray.
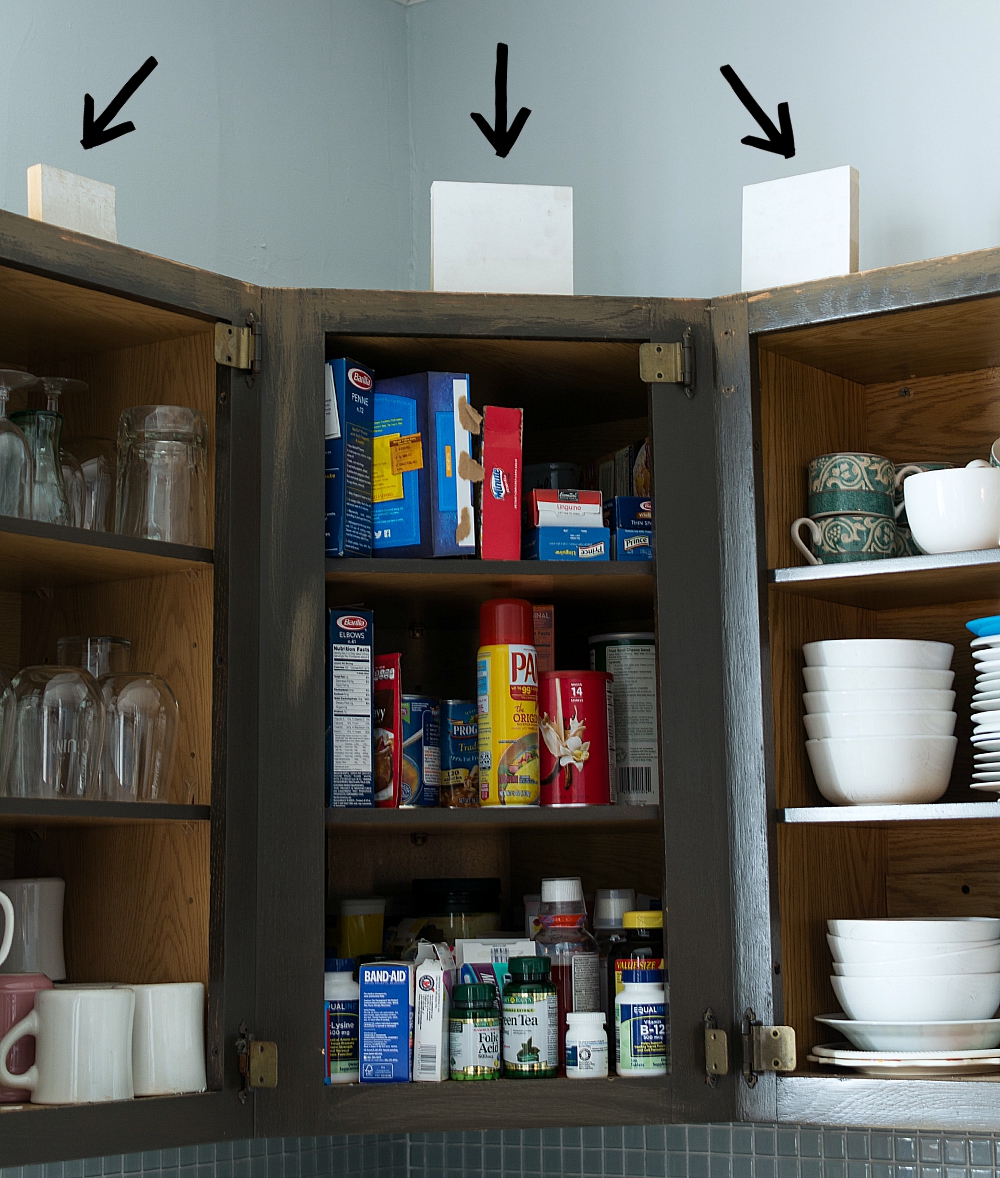
So it should come as no surprise I felt my kitchen cabinet tops needed a bit of lift too. Some added height. A tease and a spray of Stiff Stuff, if you will. 🙂
I’ve been dreaming of extending the height of our kitchen cabinets ever since I stumbled across this tutorial. But I kept putting it off and putting it off. Mostly because I doubted my skill level.
I knew I could never master the crown moulding miter cuts that would be needed. So my plan was to remove and reuse the existing crown.
Sounds easy enough, right?
Wrong.
Which is also wrong. Because it really was much easier than I thought. The biggest problem was my fear. I was paralyzed by it. I was worried I would split the wood. Damage the cabinets. Leave my kitchen in much worse shape than I started. And then I would have to scramble to hire someone to come in and fix my mess.
Luckily, that didn’t happen!
But enough about me and my big hair and go go boots and fears of splitting wood. On with the tutorial …
How To Add Height To Kitchen Cabinets
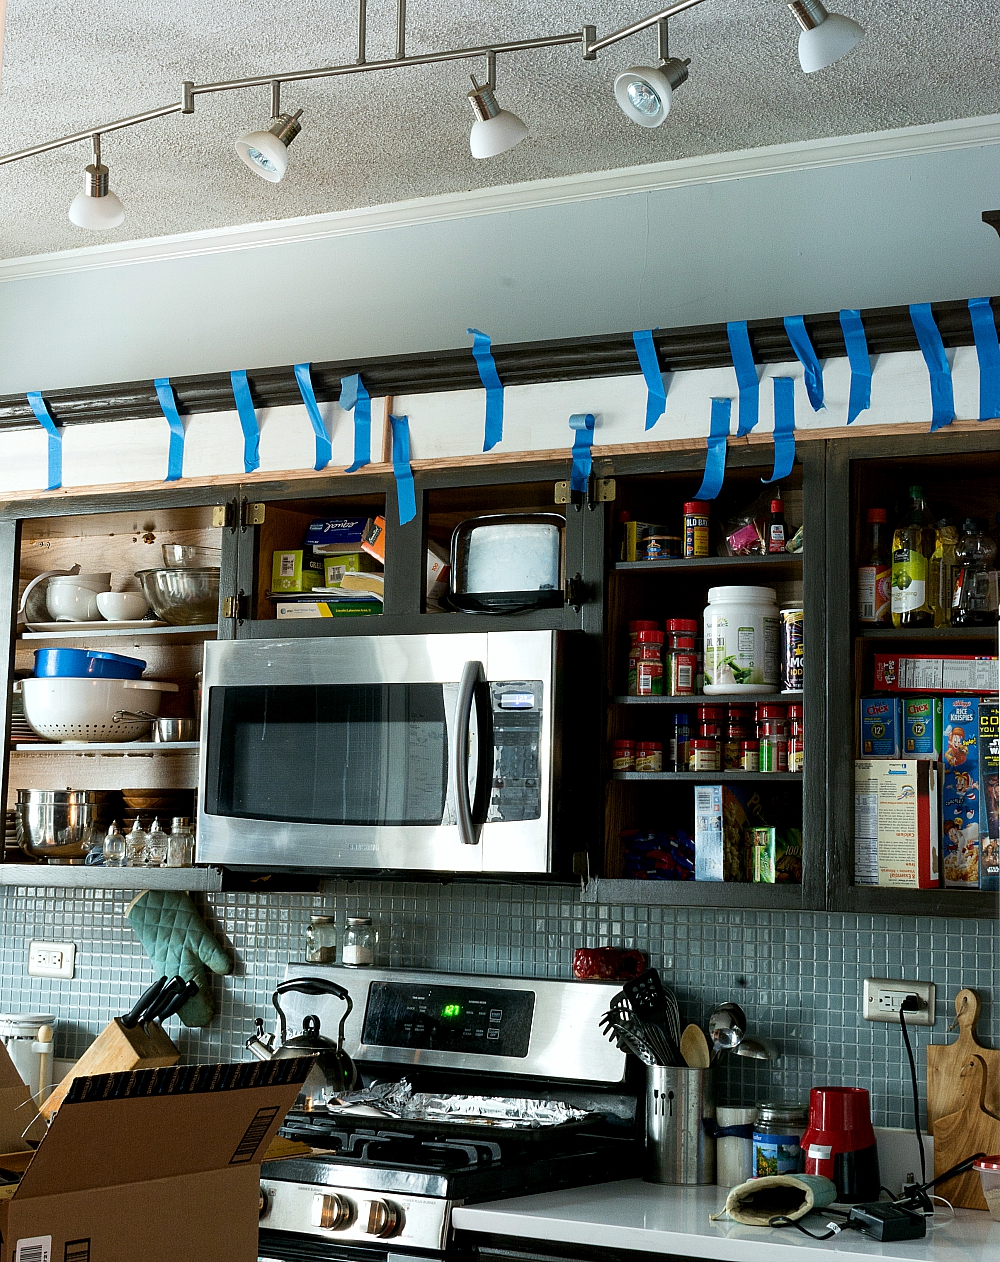
Step 1: Remove Existing Crown Moulding
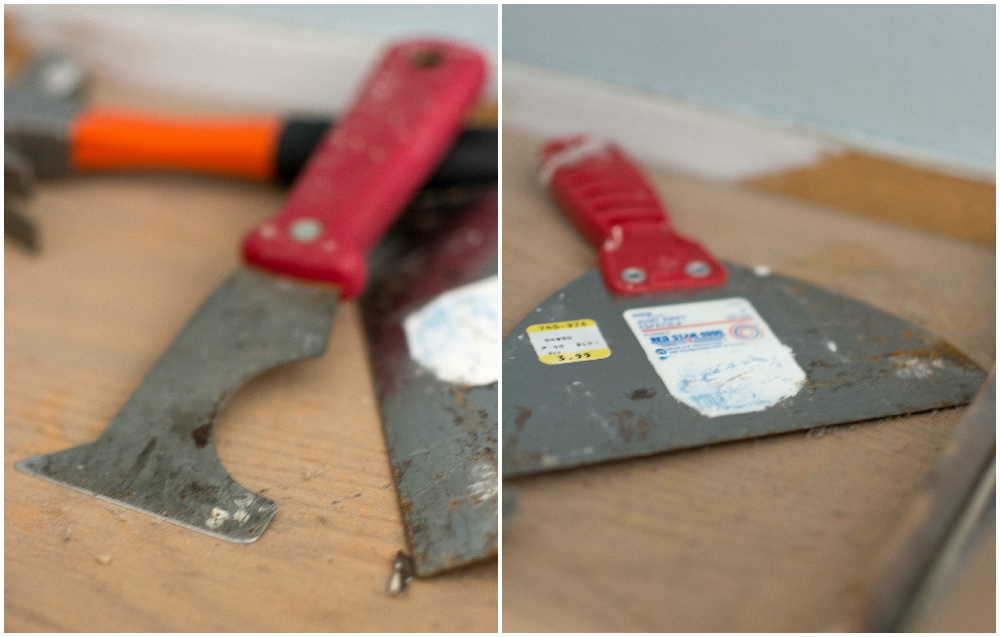
After wasting an hour or so looking for my crowbar (which I never found, by the way) I decided to just have at it with my 5-in-1 and a spackling thingy tools.
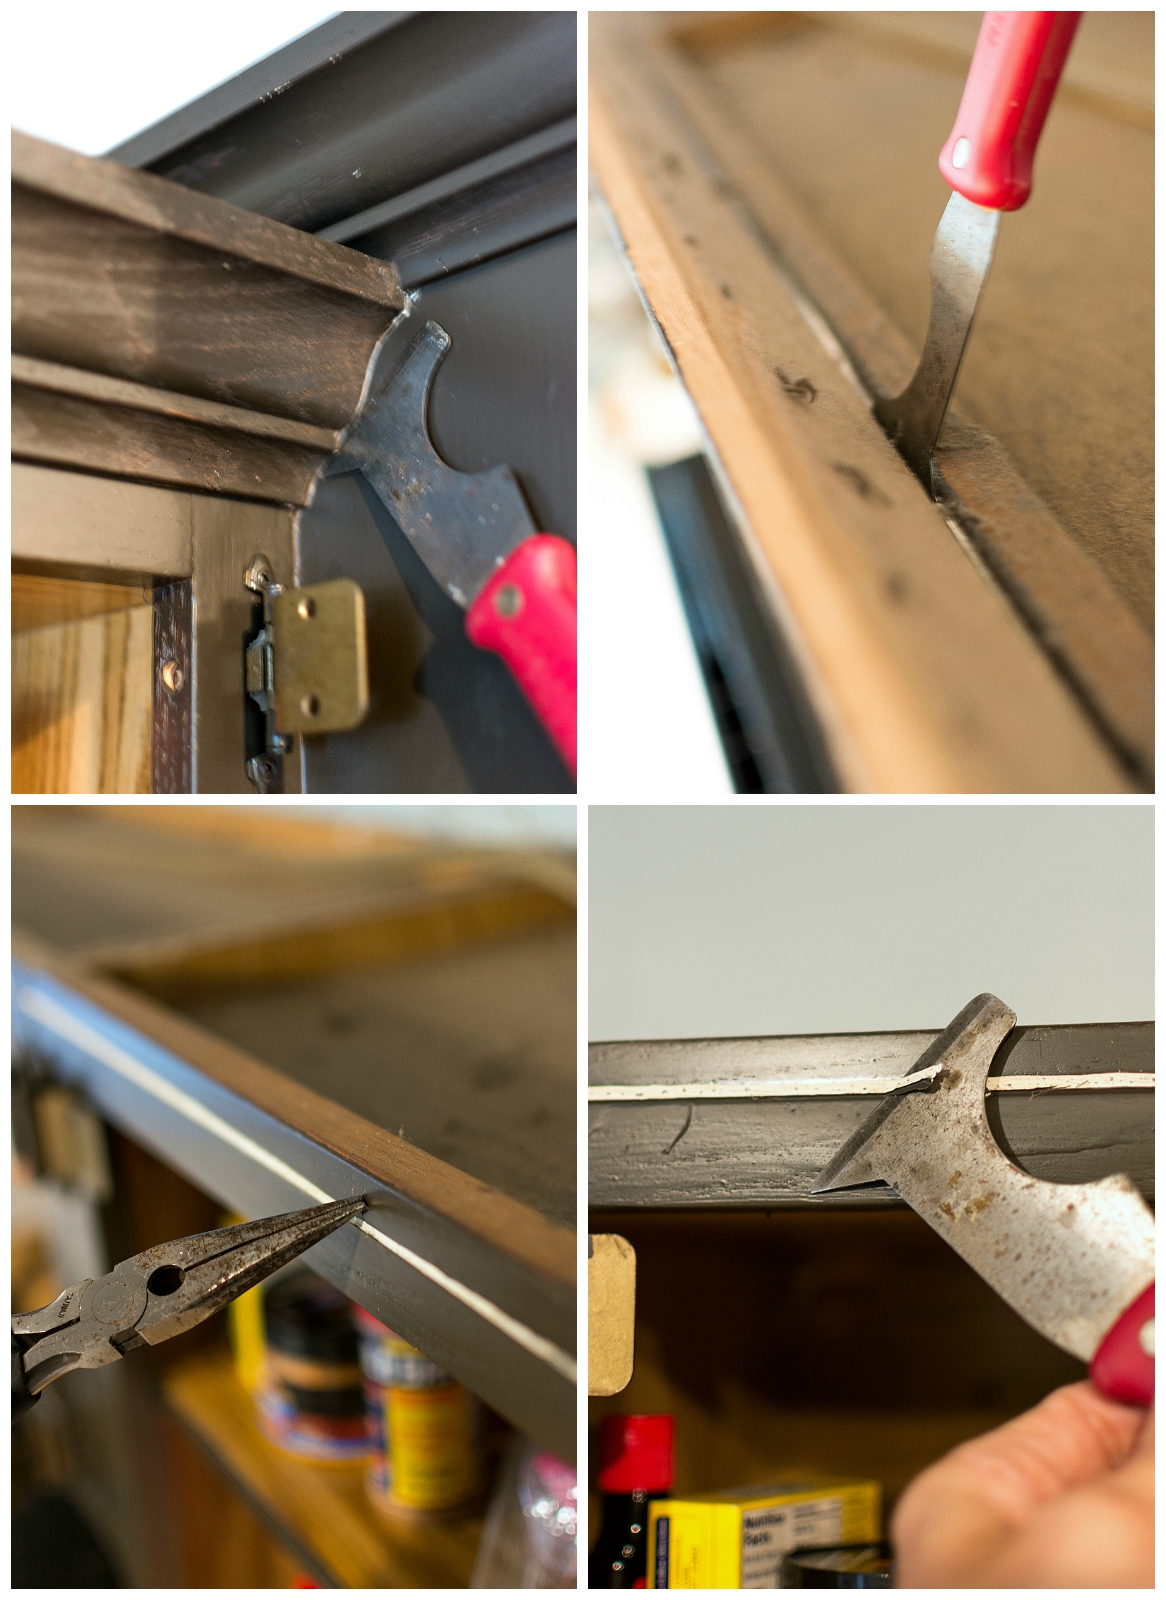
From top-to-bottom, left-to-right:
(1) I used my 5-in-1 tool to scrape away at the old caulk around the moulding;
(2) I simply inserted the tool between the moulding and the top of the cabinet and gently pried the moulding off working my way slowly down along the cabinet tops (luckily no wood glue was used and it was just thin finish nails holding it in place);
(3) With my needle nose pliers, I pulled out the finish nails;
(4) I used the 5-in-1 tool to scrape off the old caulk.
(5) Not pictured: I finished it all off with sandpaper to removed the remainder of the caulk.
Step 2: Lumber & Trim Moulding
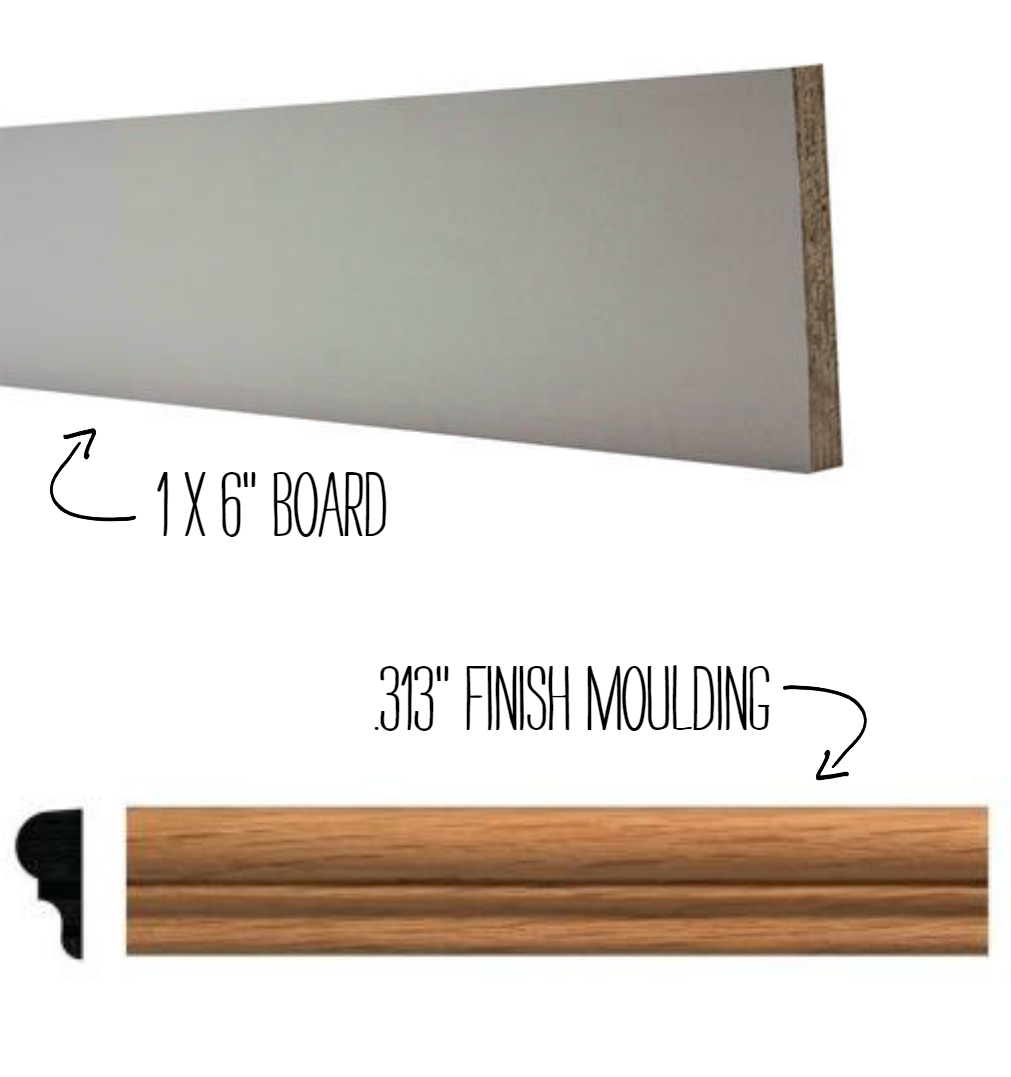
The first decision was how much height to add. I didn’t want to go too high. But I didn’t want it wimpy either. In the end I went with 6″ and settled on a primed pine boards. But before going to the home improvement store, I measured out all my cuts (not once, not twice, but thrice) and created a diagram of the cabinets tops on a piece of paper. After I pried off the moulding, I went back and quadruple checked and then headed off to the home improvement store. With my trusty diagram in hand, the nice young gentlemen at the store made all my cuts for me.
I also picked up some trim moulding to cover the seam where the boards would sit on top of the cabinets. This small piece with a flat back was the perfect size. I didn’t have cuts made at the store since I knew I could handle it with my handy dandy miter box.
Step 3: Attaching the Boards
I started by adding some scrap wood blocks to the inside backs of the cabinets using construction adhesive. I didn’t glue and/or nail the boards into them, but they served to help balance the boards.
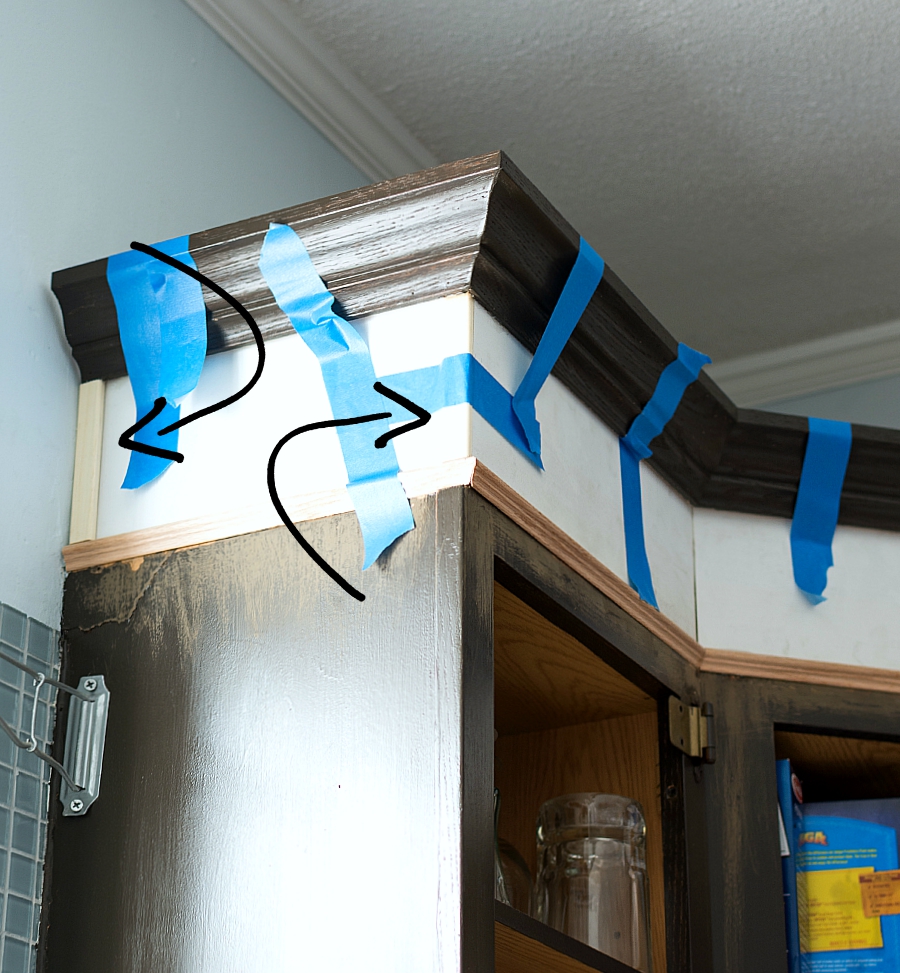
I was also very concerned about these odd angles …
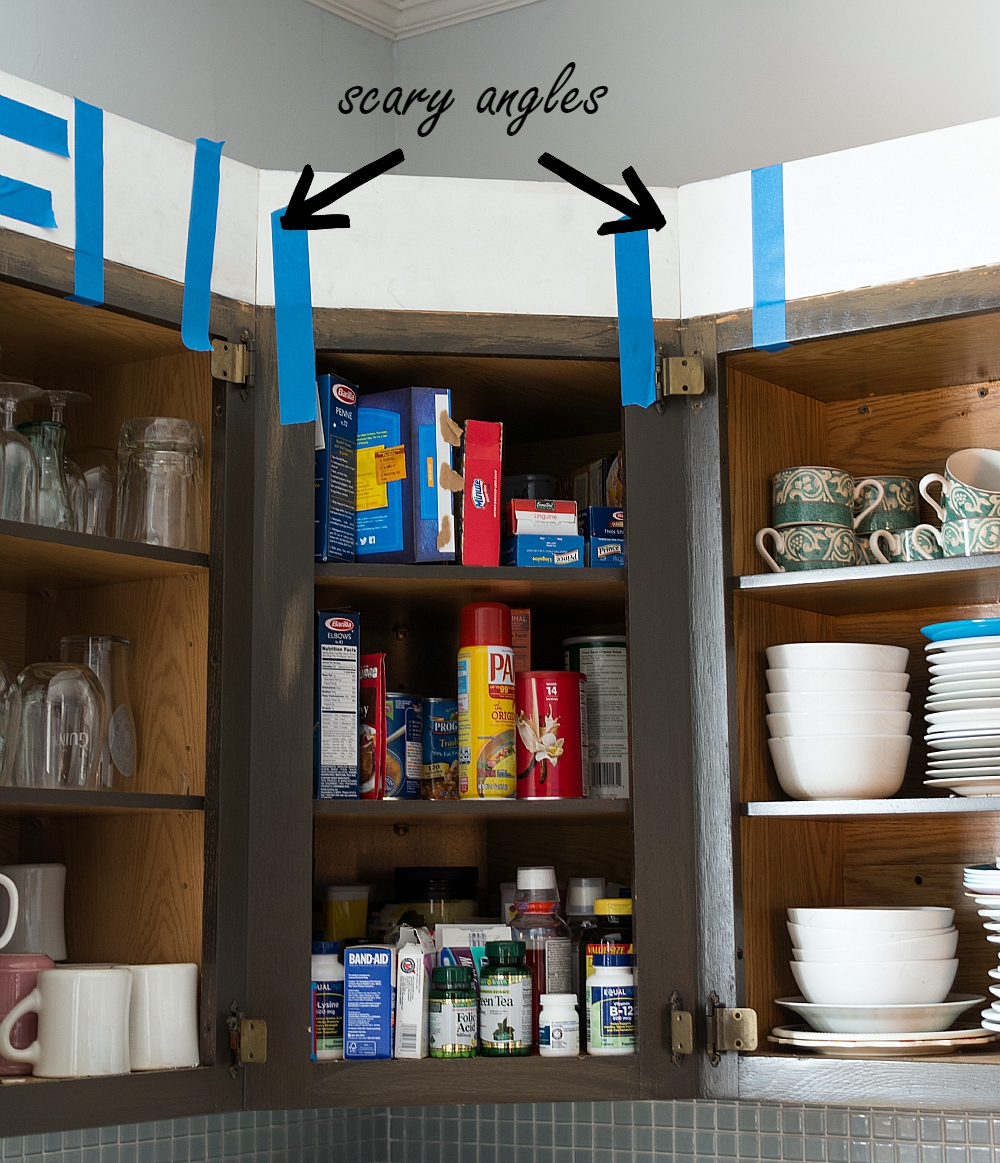
especially since I didn’t have the tools needed to make those cuts. Turns out, no cuts were needed. See …
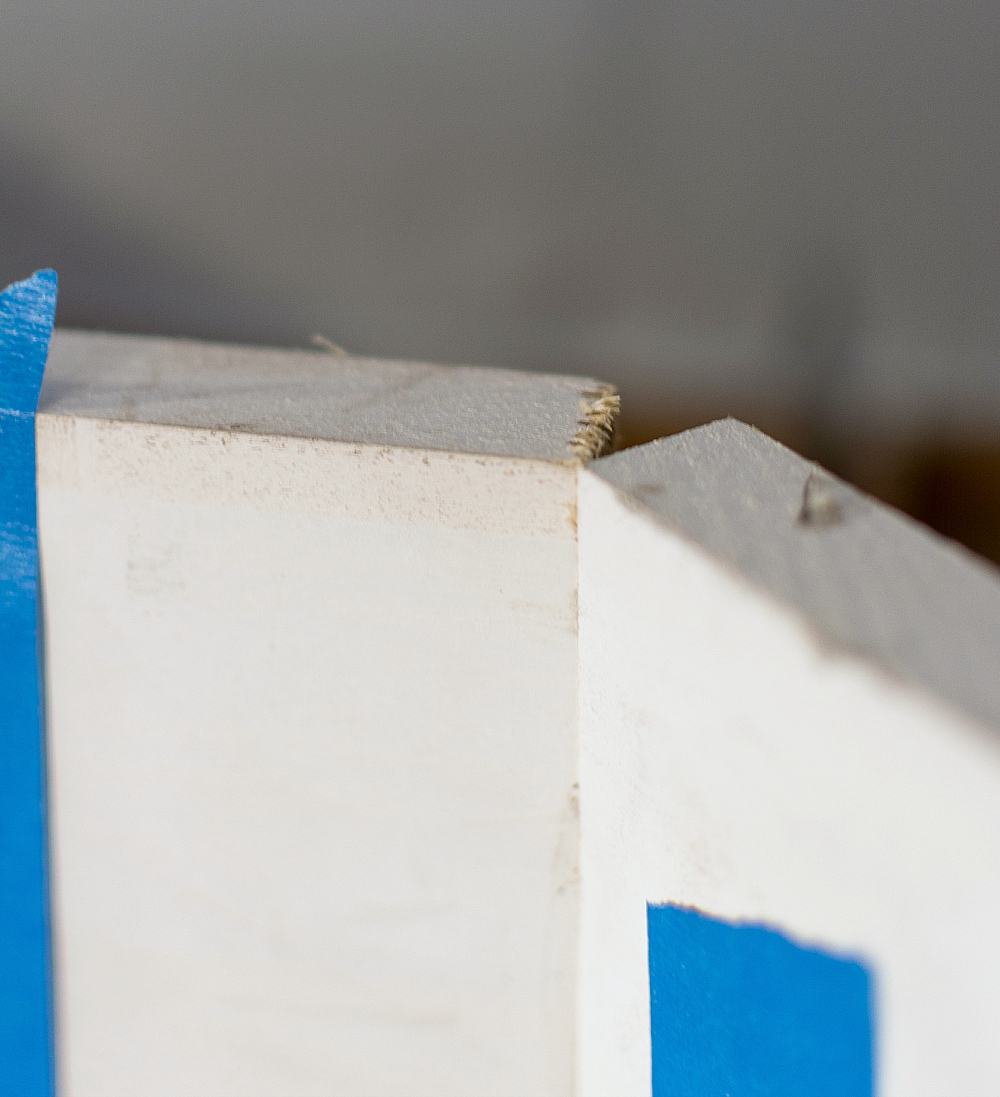
I was able to just butt two boards up against each other. So simple! And you can’t tell from the front.
To attach all the boards I used an instant grab construction adhesive.
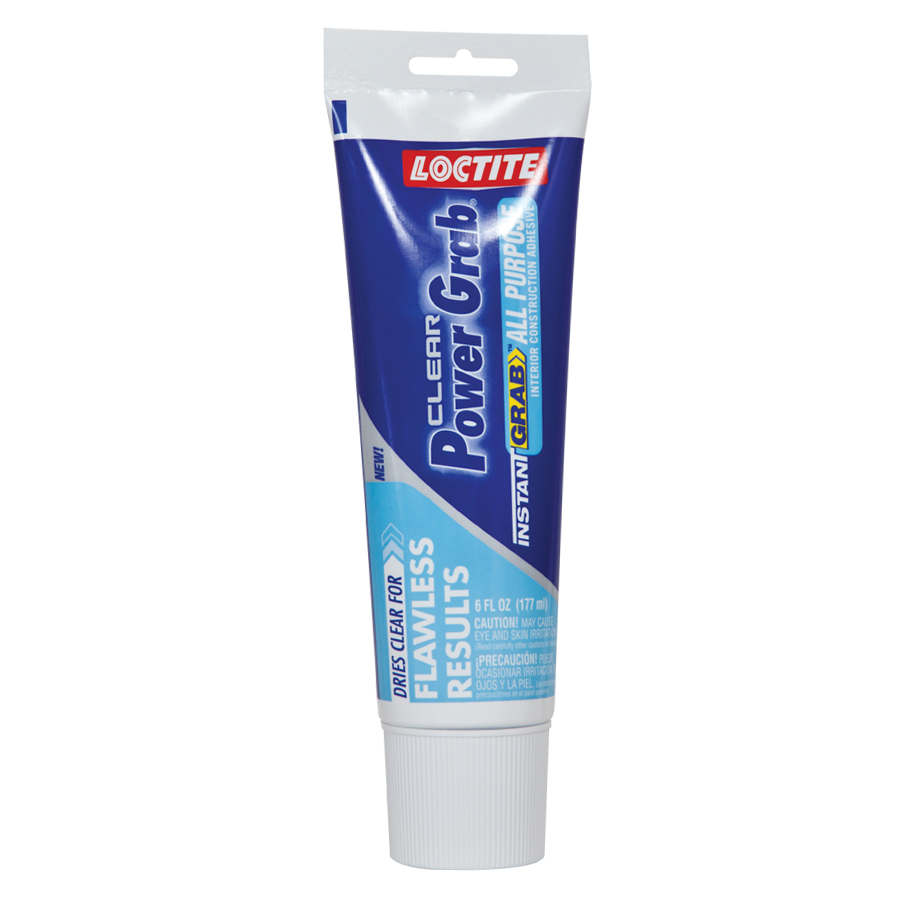
It offered flexibility to get the boards in place, and then hardened in 24 hours.
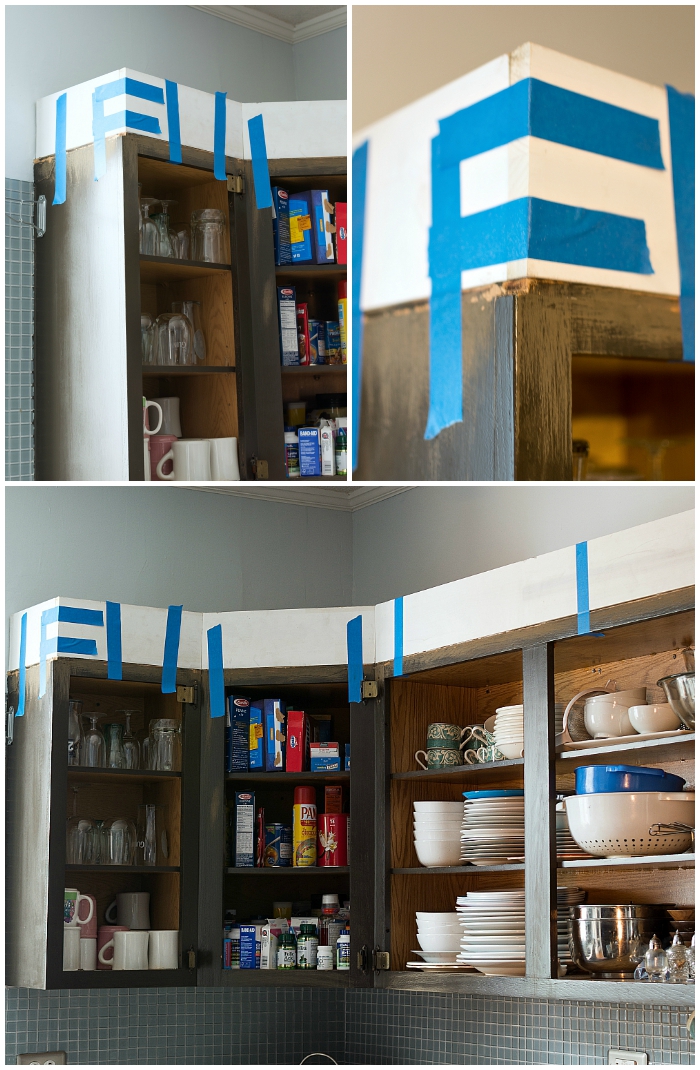
Painter’s tape held everything in place while it dried overnight.
Step 4: Adding Trim & Crown Moulding

for the trim pieces, I used my little miter box and saw for the cuts. The outer edges were pretty straightforward. Those odd inner angles took a few tries (luckily I had an extra strip of moulding to play around with). Any errors I figured could be covered up with caulk. All pieces were attached using the Loctite.
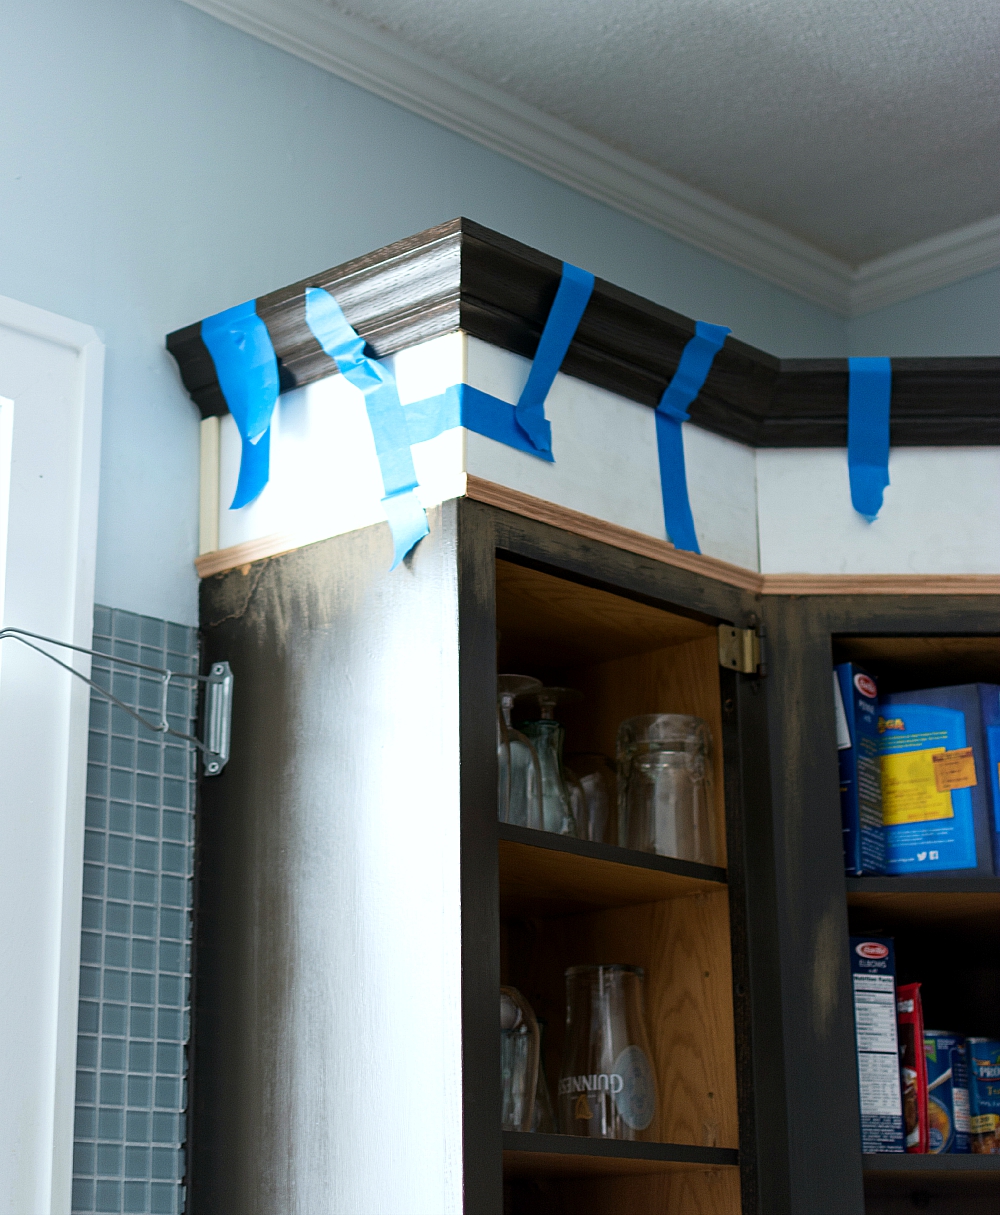
We then simply reattached the old crown that we pried off. Again, I used the Loctite and painter’s tape to hold it in place. However, I did add a few balsa wood trim pieces to help carry the weight (see below).
I even used a temporary piece in the middle of that huge piece of moulding.
And, yes, my kitchen was a disaster area for a few weeks during this process.
Step 5: Caulk, Prime & Paint

This is pretty straightforward. I caulked along the crown moulding and seams. And then gave it one coat of primer and two coats of my cabinet paint (an alkyd paint matched to Clark+Kensington in Chalk).
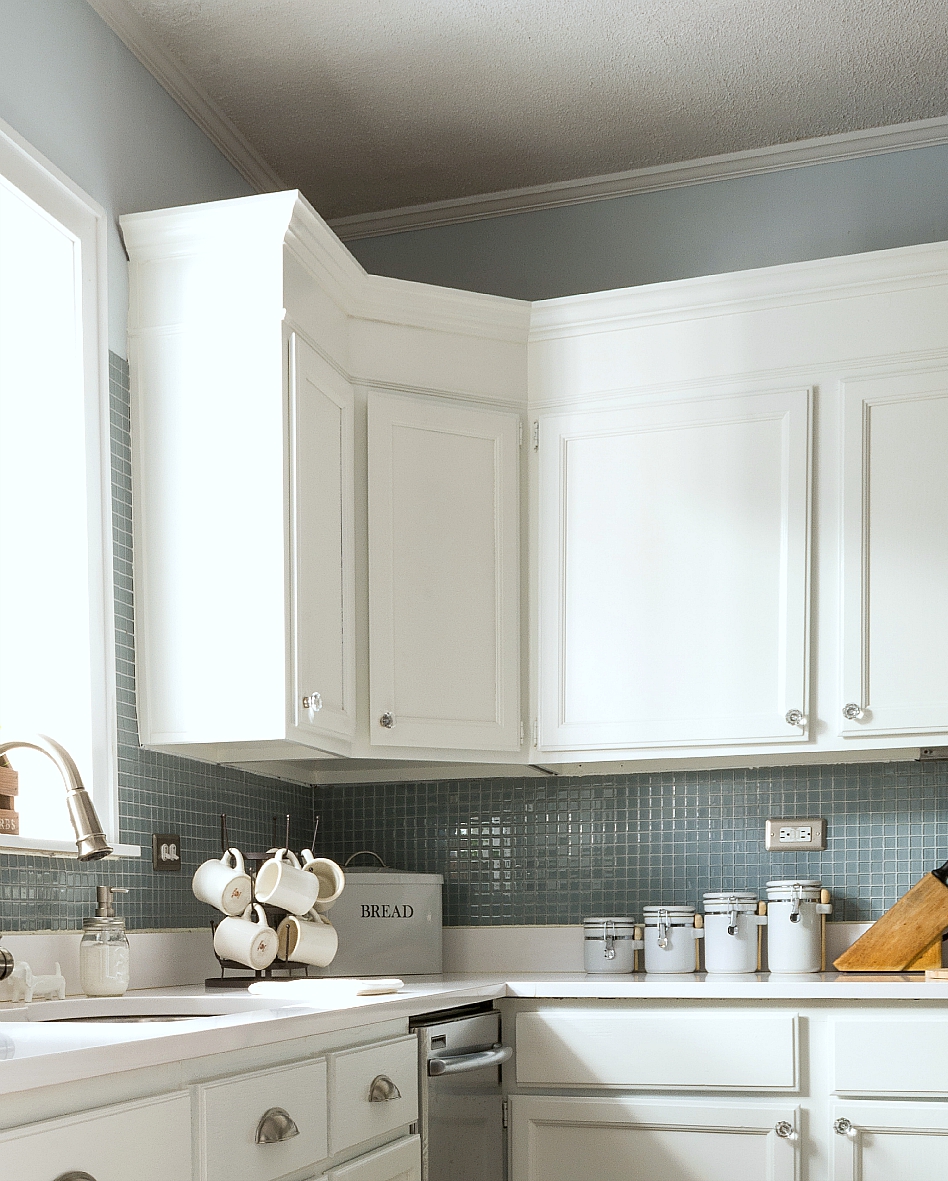
In the end, it was much easier than I thought.
And now let’s hope my 80’s style bigger cabinet tops don’t go out of style anytime soon! 🙂
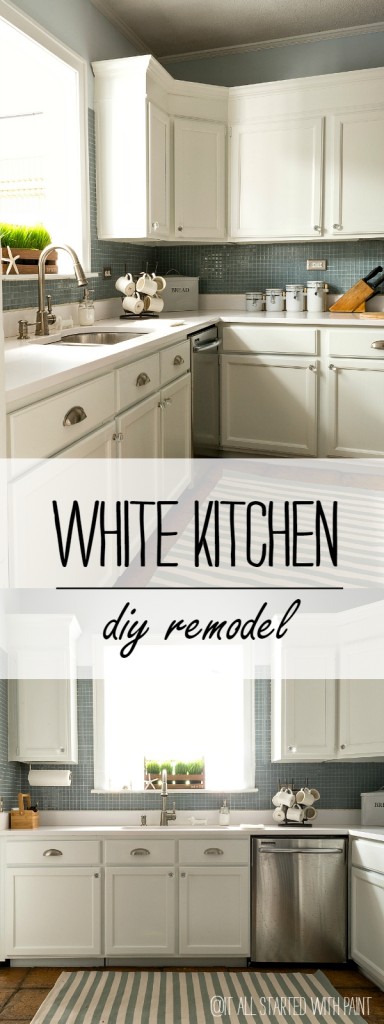
You can find the full kitchen reveal by clicking here …
You Might Also Like:
WOW!!! I am impressed. That is way too much for me to even think about attempting but yours turned out fantastic. Your kitchen looks great!
Great job! I love that it was easy and your instructions are great! (I never did have big hair though, Just a little extra lift in the front.)
Great tutorial and your cabinets look fabulous.
Awesome! That really took your cabinets up a notch in looks, and you really make it look doable
by regular folks, like me, with not a lot of carpentry skills.
And thanks for the clue about the glue. I hadn’t had that type, but will get a tube for repairs in my new house I’m making into a home.
And I am anxious to learn how to caulk the seams where the wood doesn’t quite fit tight against the walls, cabinets, etc.
You’ve inspired me. Thanks so much for the great tutorial!
And what is the real name for your 5-in-one tool thingy? I’m afraid the guys at the hardware store won’t know what I mean by that.
Janie
It’s actually called a 5-in-1 painter’s tool. And as for the caulking, I recommend searching up some YouTube videos. That’s what I did a few years ago when I first attempted to caulk with a caulking gun. Thanks so much for your lovely comment!!! 🙂 Linda
Genius and just beautiful. You rocked it out with this one.
Kris
I’m so proud of you, Linda! The cabinets turned out great and wow, what a difference. I’m with you in the hair department – I feel all flat and blah if I don’t have just a little lift in my hair. lol Do you remember stirrup pants? Now THOSE were the bomb with go-go boots. Ha!
You did a fantastic job!!! For anyone else out there in blog land who wants to do this project, email me first. I want a chance to buy stock in 3M Painters Tape before you begin. lol
I love your new kitchen, Linda! You rocked those tools, the cabinets look great!
I love the cabinets!! Did you have to sand them before painting?
Here’s a link to how I redid the cabinets: http://www.itallstartedwithpaint.com/white-kitchen-cabinets-white-counter-top-blue-gray-backsplash/
I just now saw this ~ great idea! I do have a thought: what if you put pieces of narrow wood strips to frame those new boards in “sections” over each separate cabinet, so they look like rectangular cabinets, trimmed just as the present doors? Could even add knobs …