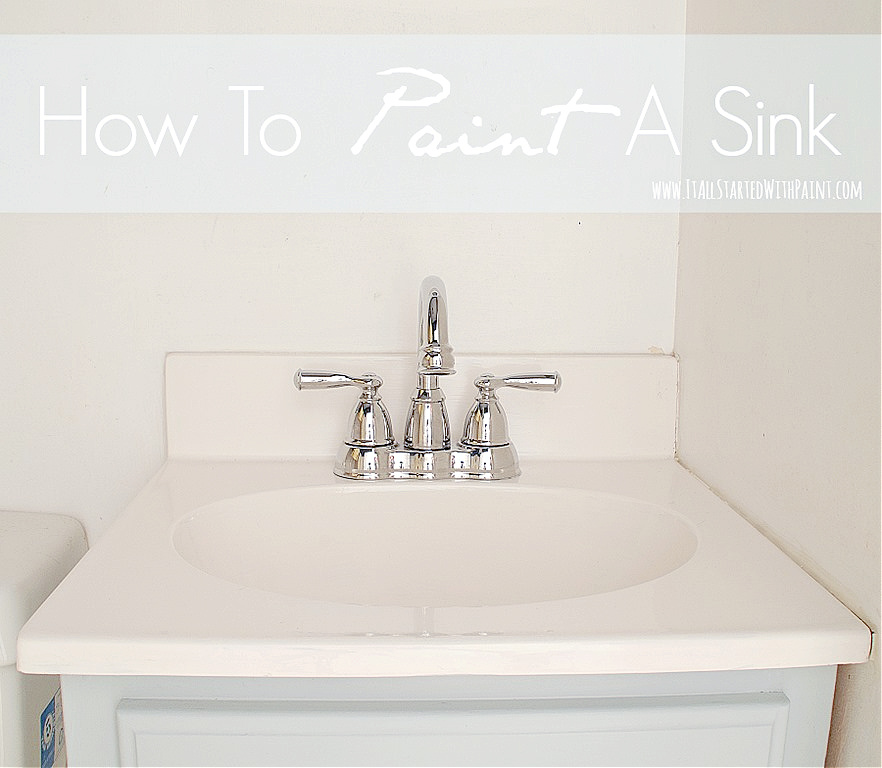
How To Paint A Sink: Detailed Tutorial on How to Make Over an Ugly Sink with Paint.

This isn’t the first time I’ve painted a sink. I’ve done it before …
before I was blogging.
Back when I was just a blog reader. A student of DIY blogs, if you will …
Had I known back then that I would start a DIY blog, I would have known that my how to paint a sink tutorial required me to take a proper before picture. Like so.

Of my faux marble-look fiberglass bathroom sink in all it’s cringe-worthy glory …

And if I had been blogging the first time I painted a sink, I would have know to take a picture of the supplies I used …

including the Homax Tough as Tile Tub, Sink & Tile brush-on epoxy.

And I would have given you a full materials list …
Materials*
Homax Tough As Tile Tub, Sink & Tile Epoxy
(there is also a spray on Homax product that you can find by clicking here)
Steel Wool
Sponge
Paint Brush
Finally, if I had been a blogger the first time I painted a sink, I would have taken step-by-step pictures along the way …
but I didn’t take any pictures the first time I painted a sink.
Luckily I’m a blogger now. And luckily, I’m an Ace Hardware blogger now and they generously provided me with that Homax Tough as Tile product so I could paint that hideous sink up there in those cringe-worthy before pictures.
How To Paint A Sink
Step 1: Read the Instructions.
Carefully. I’m serious. Because I did read the instructions and there was mention of a Homax cleaning solution to use on the sink. Well, I only had the brush-on epoxy paint. Luckily I’m an Ace Hardware blogger so I could turn to Ace Hardware’s expert spokesperson, Lou Manfredeni. And he said that I could prep the surface for the epoxy paint using CLR or Pine Sol.
Step 2 (Optional): Remove the Faucet.
Ace Hardware generously gave me an beautiful Moen Banbury Two Handle Bathroom Faucet in a chrome finish to replace our sad, sad, old faucet. So we took the old one out …

… and let me tell you, that old faucet didn’t want to go. Once again I must thank my husband for tackling this less than pleasant job …
If you don’t plan to replace the faucet, you can just tape it off with painter’s tape before applying the Homax Tough as Tile epoxy.
Step 3: Clean the Surface.
The instructions can’t stress enough the importance of surface preparation. Give the sink a really good scrub down. I used CLR.

Rinse and dry.

Step 4: Scour with Steel Wool (Grade 000)
Use small circular strokes to scour the surface with grade 000 steel wool …

Rinse and dry.
Step 5: Repeat Steps 3 & 4 a Total of 3 Times.

Step 6: Tape Off Area.
Using painter’s tape, tape off drain and area around sink that you don’t want painted.

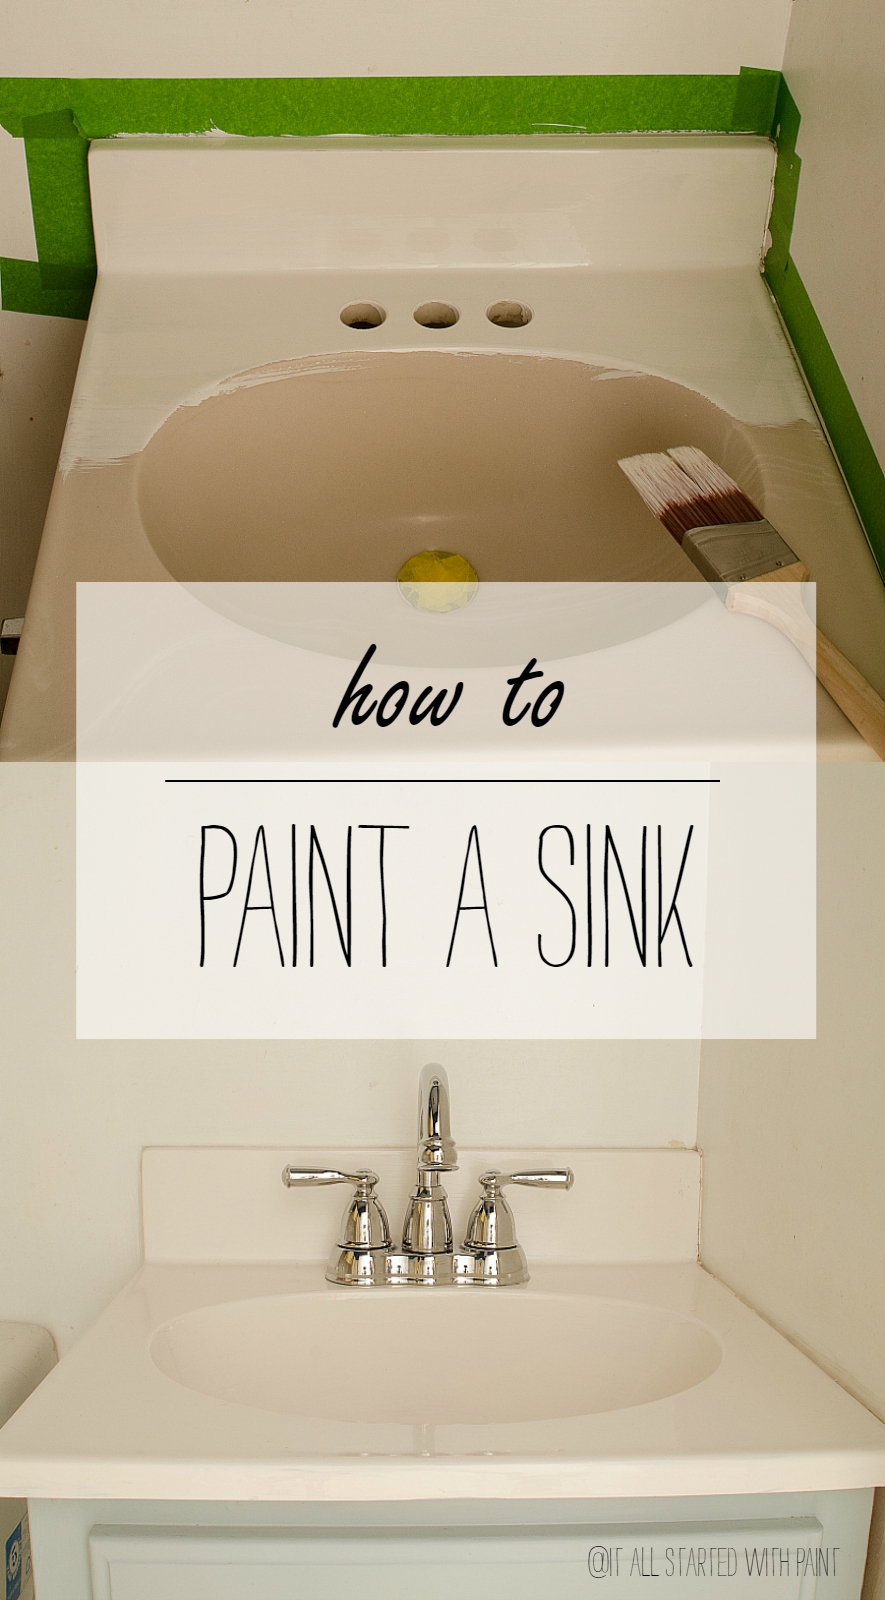
Step 7: Paint First Coat.
Carefully stir epoxy. You don’t want bubbles to form. Use a nylon bristle brush to apply in long clean strokes.

Don’t overload brush. A thinner layer is better.
I also go back over to make sure the strokes start at one end and end at the other.
For the sink basin, I applied in a circular pattern starting at the top rim and proceeding down to the drain.
Step 8: Apply Second Coat.
The second coat needs to be applied 2-4 hours after the initial coat. If more than 4 hours have passed, allow the paint to cure for 72 hours before applying the second coat.
Also, if drips or runs appear in the first coat, let cure 72 hours and then use your 000 grade steel wool to scour them away. Rinse and dry before applying the second coat.
Step 9: Final Cure and Use.
Do not remove the painter’s tape until the epoxy has fully cured for a minimum of 72 hours.

To care for the surface, use non-abrasive non bleach cleaning products and a soft sponge or cloth.
Now, can I just tell you how much I’m loving this solution? So much easier and less expensive than pulling out the vanity and buying a new vanity and hiring a plumber and contractor to install the new vanity …

Oh, yeah, I gave the cabinet a spruce with some paint and wax and new hardware. But I’ll share that project at a later date …

most likely after I get some beadboard wallpaper up on the walls. A project I’m hoping to tackle this week …
Now here’s the really exciting news. Ace Hardware wants to give one of my readers a quart of Homax Tough as Tile brush-on epoxy AND a $50 Ace Hardware gift card. Enter here …
So, aren’t you glad that I’m a blogger the second time I painted a sink? Not just for the complete tutorial, but because now I can share an official “before and after” picture …
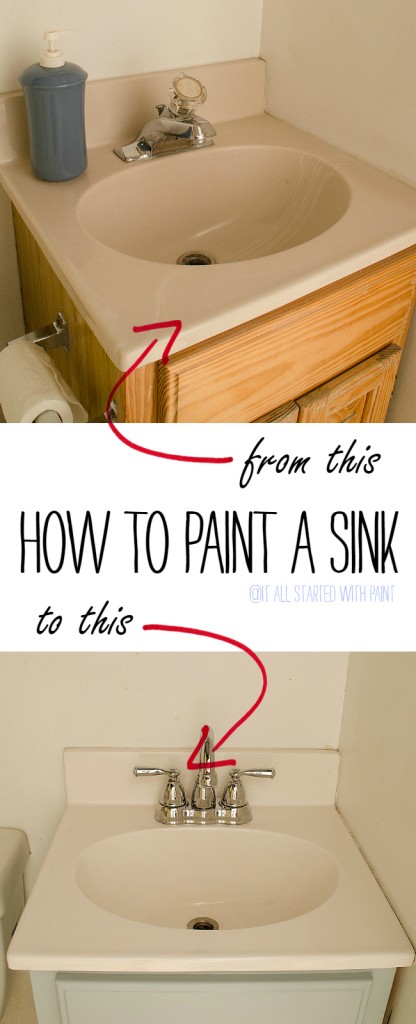
🙂
For the full bathroom reveal, click here …

I also painted the sink in our powder room. You can learn more about it by clicking here …

You Might Also Like:
How To Add Height To Builder Grade Cabinets
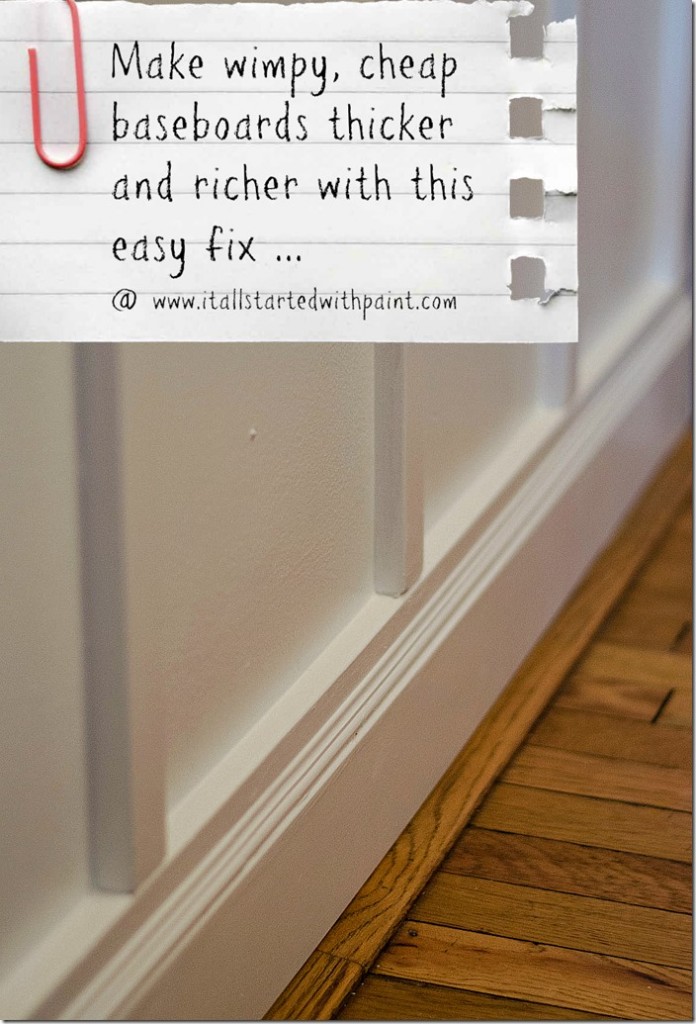
Easy Fix to Beef Up Baseboards (click here)
This post was written as part of my partnership with Ace Hardware as a member of the Ace Blogger Panel. Ace Hardware provided me with all the materials needed to complete this project and product review, including the Homax Tough as Tile Brush-on Epoxy and Moen Banbury Two Handle Bathroom Faucet. However, all opinion about the products supplied are 100% my own.
*some affiliate links included in post.
I love mason jars because they are so versatile. Currently being used in my kitchen for doggie treats.
OOH!! I’ve wanted to try painting a sink since we have lovely 1980’s fake marble sinks in our house. Do you find the paint chips off with wear? It would be for our main bathroom so wondering how long it would hold up. Hmm – thanks for the post. Hope i win!
we purchased a home with the main bathroom sink painted a medium gray. Done nicely and he have been here 18 yrs now and it still looks as good as it did when we moved in. Don’t know what they used or how they did it, but lasted that long. Now I am in the middle of painting my powder room sink with the same stuff Linda used. Just started steel wool on it.
Hey!
It’s been enough time. How does it look now?
We’re thinking of doing this but want it to last at least two years.
It still looked great after 2 years. One I painted is now on 7 years and it’s looking a bit discolored and chipped in places. It’s not meant to be a permanent solution.
Mason Jars! They make me think of my Nanny and Summer, from canning or just drinking sweet tea in them. Now there are so many different things that you can use them for. They are great for decorating, painting and craft ideas. But I must say my favorite is drinking from them!
just did this to our ugly, beige fiberglass tub/shower. its not a smooth, but still a great improvement!
I love how smooth the finish is!
I was so happy to have found this site, I have those same ugly sinks in both bathrooms of my home, double in the master bedroom, I hate them, I am painting the bathroom walls and did not know what to do with those ugly sinks. My question is this to avoid the sinks to look flat would you advise that a glaze be added to the second coat? Also could I use any color? I would like black sinks in the master bedroom,is that a color I could use?
So beautiful! What an easy fix too!
I love mason jars because I just recently discovered that they look great painted or decked out in some washi tape! Add some flowers and wow!
Thanks for the giveaway!
I love Mason jars for everything! Food, crafts, decoration.
Finding this was timely! I’ve been researching how to paint the faux marble laminate in my master bath! P.S. Love the color on the vanity.
What color is the vanity?
Here’s a link to the colors and details about how I painted the cabinet: http://www.itallstartedwithpaint.com/bathroom-paint-colors-100-gift-card-giveaway/
It looks fabulous. What a great job and super tutorial. Thanks tons for linking to Inspire Me. Hugs, Marty
What a difference… and such a neat product. (didn’t even know there was such a thing!)
I forgot to add.. I would use the gift card towards purchasing a new saw or maybe some new hardware.. :0)
Great giveaway!
My sink could look better.
I have a super ugly sink! Think scalloped and yellowy-tan. I would love to transform it with this!!
That’s awesome! I had no clue you could do this!!
NO FREAKING WAY!!!! I had no idea…and you’ve done this more than once!?!?! VERY cool! so cool, in fact, that I may try it! Right about now, I’m wondering if I could use it on my fiberglass shower surround that is NASTY beige. Well done, girlfriend. I love the faucet too! xo
Horribly ugly sink in our home we are remodeling! I could TOTALLY use this! I didn’t even know this was possible. Thank you!
I Love Ace Hardware! I shop there a lot. Due to being in a rental unit, I can’t paint my bathroom sink, but I could definitely stock up on some supplies for my crafts…paintbrushes, glaze..stuff like that, and a few things for my new place.
Nice
This really got my attention — my sink is 1950s “seafoam green” and the ceramic tiles are pink. I’ve always wondered if I could paint the sink. Seeing how great yours turned out gives me hope!
I think that is fabulous. It looks so good. I am so glad that you are a blogger for Ace. Do you do the same prep for ceramic tile? I have some blue tile I would like to paint.
I never even thought of painting a sink. I read this as I want to paint our wood vanity and see the results from some one having done it. 🙂
Oh my goodness, my friend has been bugging me about doing this in her bathroom for the past year. Glad to know that it really works. Heading to Ace now!!
Who knew you could paint your sink???? What???? I’m so doing this!
Yep I have a beyond ugly sink that could use this. I really appreciate this post, now I have to do this.
You said the B word. I’m thinking that’s a project around here for 2014.
My sink has seen better days. I thought I was going to have to replace it. What a great idea!!
I am in desperate need of this prize!! I have a faux avocado GREEN marble sink and it is hideous! Ace Hardware is just down the street from my home and I love to shop there!
I really need to do this to the farm sink in my kitchen again. The last product I used really didn’t hold up.
I know this was years ago but I am thinking about doing this to my farmhouse sink and wanted to know how yours turned out??
There is definitely some wear and tear. And the sink in the kids bathroom has taken a beating! I’m planning on posting a “where are they now” update on the sink in my powder room soon. Probably next week. I’ll send you a link when it goes up!
Love Ace Hardware and love your blog. It has so much inspiration packed in each post. Thank you.
This looks so cool!! I definitely want to try this project. You are cute and funny as always, even with something not so exciting, but necessary as painting a bathroom sink!
Love it! What a great and affordable way to give an old item a facelift. And I have just the sink in mind:-)
i most definitely have an ugly sink!
This is MARVELOUS! It’s gonna happen in our master bath! Thanks for sharing, Linda.
I would paint my black countertop
I would love to redo my upstairs bath!
Never ever thought to paint a sink!…… Something to try!
Love your sink!!! Haha…not sure I have ever told anyone that before. I love Ace Is the place too!!!
My sink is ok but my walls could use some paint!
Wow! My new place has the ugliest sink ever made, every shade of yellow and harvest gold all swirled up into a marbelized effect. I NEED this product!
I had absolutely no idea you could paint a sink! This opens up a whole new set of ideas for my main bathroom re-do! Thanks!
your sink rehab looks great.
I had no idea you could paint a sink. That’s the best news I heard all day. I have the ugliest yellow bathroom sink!
I don’t currently have an ugly sink, but I do love Ace!
Well that looks pretty amazing! Beautiful job!
xx
Anne
I have two very ugly sinks but they are SO ugly that the only thing that could save them is to be removed cabinet and all! But I sure could use $50 to Ace for painting supplies. I’m trying to Repaint every room In the house.
Oh boy! Do I have an ugly sink! The previous owner restored vintage sports cars and washed his greasy hands in the bathroom sink – yerk!
I could use this in Mike’s bathroom. Thanks for the giveaway.
Your sink looks wonderful. Unfortunately, I had a bad experience with mine when I did it a couple of months ago. Ours started peeling and now we have to get a new sink. lol. I hope yours holds up. Mine did look wonderful at first. lol
Our bathroom sink has started to rust around the drain. It is awful.
I live two blocks away from an Ace Hardware Store… what fun it would be to win that $50 gift certificate!
No ugly sink… would probably purchase odds and ends for crafting… my husband paints bathtubs in motel rooms and the paint jobs hold up really well. The prep can be important… sanding, primer, etc., if needed.
I wonder if you could use this on a shower or bathtub insert? My sinks look good but I’d love to try it on my bathtub or shower.
I have a very ugly sink & vanity! Can’t wait to tackle this project now!
So glad I found this post. I need to try this on one of my 5 old sinks1
My master bath has an ugly sink. It’s the faux marble stuff. It’s the last thing in that bathroom that I haven’t done anything too and it’s bugging me!
all 5 sinks & vanities and faucets are UUGGLLYY! I’m willing to give it a shot!!
I would love to try this! We have a couple of chips to cover up in the bottom of the bowl. Would you notice them or would the paint fill in the chipped part?
I had no idea you could paint a sink! Yours looks so bright and clean and new. Thanks for sharing – Dawn @ We Call It Junkin.com
I have a dark green one I LOVED 15 years ago..I may give this a try!
I would love to do this on my tub! My husband used a mold killer spray and it ate the finish off my tub! 😮
We have random things broke that need fixed. That gift card sure would help!
We are retouching our bathroom and the sink was one of things we wanted to update, we though about buying a new one but we don’t have the budget. This is something we can afford, thank you !
I have bathed so many dogs in my bathtub that it looks terrible. Could you use this method on bathtub?
I would love to try this on my sink. How big of a sink will it do?
Love this – going to try this on our new house when we move in January!!!
We had our cultured marble sink and counter top painted professionally about five years ago. It has started to peel in a couple of places. That sink gets a lot of use! I’m wondering if you can paint over the first coat. I have a feeling the first coat would start to roll up if you sanded it. Any thoughts?
I missed the giveaway, but I definitely need to do this to my master bathroom sink/vanity! I’ve been spending a lot of time fretting about how beige it is and how terrible it’s going to look when I paint the walls white. Apparently I should have spent that fretting time researching to see if something like this existed instead!
okay I am so excited my next question is could I add a back splash on top of the back splash of the sink? You see how the fiberglass comes up onto the wall? I would love to be able to add a back splash to add a little umph, 🙂 I am ready to get started. I have been racking my brain trying to fiqure out how I could change the look of the sink without the cost which can come along with it.
I love this tutorial, awesome and thanks so much. Quick question; How strong is the odor from using the Brush-On Epoxy?
I am for sure going to try this on my sink in my upstairs bathroom. It is so ugly. Didn’t even know you could do this…..and my husband is a maintenance man!
I HAVE A GRANITE COUNTERTOP WHICH IS DARKENING IN SOME PLACES. CAN I PAINT IT WITH YOUR PRODUCTS. I LIVE IN BARRIE ONTARIO CANADA. IF I CAN PAINT IT WHERE WILL I BE ABLE TO PURCHASE THE SUPPLIES.
You might want to check the product label first. You can find the product at Ace Hardware and The Home Depot and Lowes. Any major hardware store carries it!
I am in the middle of painting my powder room sink. I have cleaned 4 times so far with CLR and I am on my second steel wool. Is this suppose to take of the shiny finish? Is this suppose to put scratches in surface? I have done this twice now and no scratches and still smooth. 000 steel wool just like you said. I don’t want to do to much but I don’t want to not do it enough either. I would assume don’t scratch surface. If you have time can you let me know if I’m doing correct or not. I am also doing the nickel floor when done with sink. My daughter calls it the 50 shades of gray powder room. Thanks
The steel wool isn’t suppose to scratch the surface or remove any sheen. It’s just to prep the surface to make sure it’s clean so the “paint” will bond. It sounds like you are doing everything correctly! Good luck!
I have two coats on already and so far so good. I am going to use a third coat because the sink was a blue and is not covered completely. But you advise was great and so far the coverage looks good and I have been putting on thin layers and I like it. Thanks for your help. I’ll let you know when I am finished with third coat how it turned out but I am sure it is going to turn out awesome.
I’m so happy it’s working for you!!!!
Thank you so much for blogging this! I am very excited to give my sink a makeover. Although, I am unable to get the Steel Wool Grade000, but I have found the grade 0000 and 00. Would one of those work? If so, which one?
I think both would work! I would probably skew to OO, though. Good luck!
I am trying to update our 70s kitchen. Do you think this paint would hold up on a stainless steel sink?? I am desperate.
Wanted to see how you clean the new sink now that it is painted? Do you have any trouble having the paint chipping? Is there a specific product you use? How long as it been since you painted it? Are you still pleased with how it is holding up! Love the idea!
So sorry for the late response! I use regular bathroom cleaners on the sink. No chipping at all. I have noticed the color has changed a bit on the sink that I did this to 4 years ago. But nothing major or too noticeable. Honestly, the expense of having to change out the sink and cabinet vs. the expense of just painting it was so worth it! And the product I used was included in the blog post.
Happy New Year!
🙂 Linda
Wondering if you can do the same paint to a cream colored Bath tub??? Can I paint a tub??
Absolutely! It’s the same product that you can use on tubs too!
Love your tutorial, am in the middle of redoing my sink/counter right now using your blog.
Did you replace caulk around areas that need it as in the splash areas?
Did you caulk before or after painting the sink/counter?
I am unsure what to do about this.
please help and thank you for this awesome tutorial.
I am in the final stages of doing over my vanity and am quite impressed with myself and the product! After putting two coats on I had forgotten to close the bathroom door one day. I walked in to find some footprints and remnants of cat fur on the counter top. My cat, Phil, got up there and I thought, “now what”? So, I had an on line chat with the company, Homax, and was told that I could lightly sand with 220 sandpaper then add another coat. That was a relief! Since then, tonight marks 72 hours of curing and I’ve had a space heater in there as well. I’m in upstate NY and this is February so I wanted to be sure to keep it up to temp. In my case it definitely needs more than 72 hours and I’m being patient because, luckily I have another full bathroom, so no rush! Thanks so much for posting this project! What a treat not to have to replace the vanity!!
That crazy cat! And I’m so glad the company was able to help you out! Thank you so much for leaving such a lovely comment on my blog! And I’m so happy to help out!!!
🙂 Linda
That crazy cat! I’m thrilled to hear the company was able to help you out!!! And thanks for your lovely comment!!!
🙂 Linda
I have a double 10 ft sink faux marble sink that look like comment was left on, worth a try to pAint before we change it out with the extra expense, wish me luck
Good luck! It’s a much less expensive fix for now, right? 🙂
last year I painted the tiled wall(half way up) in my bathroom. They were a nasty blue and I painted them white. Now that I know I can “paint the ugly blue marble looking sink, I will do it white and redo the tiled wall a pretty color. Probably very soft blue. I am so glad to have found your blog. You have given me new momentum to get started on my spring projects. Thank you, thank you…………
Thank you thank you for your lovely comment!!! I’m toying with painting some tile around here too …
My hubs and I pulled a clawfoot tub out of a farmer’s field back in 2002. It was installed in my upstairs bath for a few years even though the finish was a little scratchy inside. In 2004 I took the chance on “Tough as Tile”. I did pay very close attention to the prep and let cure for 4 days once two coats were applied. Here it is over 10 years later and it’s still in very good condition. It’s terrific stuff. Prep+Patience=Happy tub owner.
So happy to hear your success story! I’ve been toying with using it on my dated shower tile. This is a great testimonial that I should give it a try!
🙂 Linda
Would this work to paint very ugly bathroom wall tiles that are scattered among some that are plain, if I taped them off from the plain ones? I know it is self-leveling, so what happens if you brush it onto a vertical surface instead of a horizontal one? Also, is there a color other than white, or an opportunity to change the color or add a design?
MANY thanks!
Yes, this can absolutely work on tiles. And it should be fine as long as you go with thin coats to prevent drips. As for colors, I think the product I used only comes in white, but Rustoleum makes a tile paint product as well, but it looks like the colors are only in the neutral range (white, biscuit, and almond). Here’s the link if you want to check it out: http://www.rustoleum.com/en/product-catalog/consumer-brands/specialty/tub-and-tile-refreshing-kit
Can I do this to a tub using the same products? I really don’t like our beige tub and it doesn’t match or bathroom redo. I know that I could have it professionally painted, but I don’t know anyone around here to do it and I don’t have the money to do it. Does the paint hold up well to wear?
Yes, this product is for tubs, sinks & tiles! It does hold up but there will be wear over time.
great job, thanks for the post
Have you tried the spray on in that brand. I have been looking for black with no luck
I haven’t and don’t know if a spray on version. So sorry!
Sadly, we bought this based on this blog post and this stuff is junk! I even complained to Amazon and they gave us a full refund…guess I will have to use my refund to hire someone to remove this product as now my guest bathroom vanity is ruined. 🙁
I’m so sorry it didn’t work for you. I’ve used it successfully on two bathroom vanities with great success.
Wow! What a transformation! Looks great!
Was there a strong smell from the epoxy? If so, what can of mask did you use?
I seem to recall that is was, but I deal with paint almost daily so I’m a bit immune. I didn’t wear a mask. Probably should have. I recommend trying to open the windows when you do it.
What color is that blue you painted the wood part of the sink?
It’s Clark+Kensington in Lucky Charm in a flat finish. I then gave it a coat of clear wax over the top to seal.
What color did you use on your cabinet?? I love it!!
Thanks! The color is Clark+Kensington in Lucky Charm in a flat finish. I then gave it a coat of clear wax over the top to seal.
I have a question for you. I just found this when I googled repairing/painting porcelain sinks. It looks relatively simple and turned out awesome!
Is white the only color this kit comes in? Or can you prep as instructed and use any color of epoxy paint?
My porcelain sink has sort of a marbled look (off white/creamy). Does this paint cover all that? I was hoping to just repair the chips in my sink. Is there a better way to do that without redoing the whole sink?
Thanks so much for you feedback!
Sorry for the late reply! I suggest you talk to the folks in the paint department at the local hardware store to see about other colors. I’ve only seen the white. And I’m not sure about the chip repairs. So sorry!
Do you know if this would cover a blue sink?
I think so? You might want to consult with someone at the hardware store though.
I saw an example on youtube where it covered a blue sink.
What a great idea for sinks! Looks fantastic.
I’m so glad to read this. I have worked for home depot in paint for more that 2 years. I’ve had many conversations with paint company reps ( including PPG which is who owns homax) as well as Pro painters that have been in the business for nearly half a century on a daily basis during that time. So far I have seen a lot of people give hot tos that are usually DEAD WRONG. People believe what they see on Pinterest and then can’t figure out why it didn’t work. You have to use the right product and you have to prepare the surface . This is exactly how I would have told someone to do this. great job!!!!
Thank you for taking the time to visit and leave a lovely comment!!! I’m so happy to be Home Depot expert approved! 🙂
This looks like a great idea for my old sinks! Do you think it could be used in a shower of the same faux marble material? How well do you think it would hold up from daily use?
I don’t know about shower application. I would ask the folks at Home Depot or Ace or Lowes.
Can you still do this if you have cracks in the sink bowl?
I don’t think so. But I would consult with an expert at the home improvement store for ideas. There may be a crack filler product you can use first? I’m not sure though.
I actually gave this a try yesterday on some faux marble. It seemed to turn out ok, although the paint dried so quickly when I was applying it I couldn’t get those long strokes. However, it left a consistent textured feel on the whole piece. Actually turned out pretty well. Not sure if it will last over time but it looks pretty cool right now. The vanity is getting a spruce up as well plus a new faucet.
Can countertops be painted?
Yes, they can. Rustoleum makes a countertop paint product. You can find it at most home improvement stores. Or you can also Google it. Good luck!
I was of the view that countertops cannot be painted.Hence, I went for countertop restoration ( https://stoneclone.ca/services/countertop-resurfacing/ ). Anyways after the restoration, the countertops looked pretty good. Can someone post the images of painted countertops?
I see that it’s been 5 years since you posted this but I was curious about the smell of the product. I have a one year old and I assume like an oil based primer this may have a really strong smell that lingers for awhile. Is that the case? Thanks in advance!
Yes, the smell is actually very strong. It’s an epoxy and the smell is even more intense and pervasive than oil paint. I would definitely take caution with your baby in the house.
Hi All,
Do anyone know of professionals who could do this epoxy paint job on my bath room vanity sink and top in Melbourne , Australia. I want to get it done professionally because in the first place I cannot afford a new vanity and want to stick with the same and want to see a professional result on a cheaper option and secondly I am hard pressed for time to do it patiently and yet see a professional result. If I don’t have an option I still would think of doing it some time I guess. !
Thanks
Jack
So I painted two coats and it looked ok so we stopped to wait the 72 hours. After 72 hours we decided it probably needs one more coat and it dried looking like little wrinkles EVERYWHERE! Do you have any idea why this happened? Do you know any way to fix it? I’m so upset and this is putting us back in finishing our bathroom remodel again.
I’m so sorry! I honestly don’t know why that would happen. I did my second coat in the 2-4 hour window (I think I did a second coat?). I know I didn’t paint it again after the 72 hour mark. My only guess is perhaps it had not fully cured? Curing time can vary based on temperature and moisture in the room. I’m not really sure what to suggest. Perhaps you can steel wool it again and try another coat? I’m so sorry but I really don’t know how to help! Perhaps someone in the paint department of Ace or Home Depot could help.
What would you use to repair/paint an old claw foot bathtub?
If it was really old and really cool I think I would outsource it vs. DIY. But you could check with the folks in the paint department of an Ace Hardware or even Home Depot to see if they have any recommendations!
Can you see the brushstrokes?
It’s a self leveling paint … however, it’s still an amateur DIY job so, yes, there are some slight visible brushstrokes. Mostly at the edges.
Didn’t you find that the paint deteriorated or chipped inside the sink?
It’s been close to 8 years now for one of my sinks and I have seen some slight wearing away along the edges. This isn’t suppose to be a long-term permanent solution. Eight years has certainly outlived the application.
Wow, given the fact that you are a DIY blogger, I have a feeling that this bathroom has probably been updated again since this, but I LOVE IT! You seriously did a beautiful job, it’s gorgeous, I love the color you chose to paint the cabinet as well!
Lol! I actually haven’t redone the bathroom! It’s being used by my kids right now so what’s the point? Ha! And thank you!
This is an amazing tutorial, I’ll be using it soon! THANK YOU!! I have a sink that I despise, it looks a bit like your “before” photos. Does the Homax come in different colors? If not, is it a bright, classic white? Thanks!!
How has the sink held up? We have a vacation cabin that needs this done, not very high traffic – actually very little use per year, so I’m hoping something like this will help the look and smell of the sink. It’s a porous plastic sink (not like the sink you painted) and over time it has absorbed a sour/dishrag type smell. I hope this will seal in the odor and give it a new look that will also last a few years. Thanks for the detailed instructions!
It definitely a temporary solution and my sinks aren’t looking as great as they did after the treatment. But I also did two very high traffic sinks! Honestly, they still look better than the before. Even with some scratches.
Thanks for this. Have moved into a house with a pink basin set in a blue/green tiled surround with a blue patterned tiled splash back, so I think painting it all white is the way forward. The basin has a chrome trim however so I was wondering if you had any experience of painting metal with the same type of paint? I think it will be beyond my skill level to paint around it.
You did a great job with the sink and cabinet, but the best update was changing out that incredibly ugly faucet. I know we’ve all probably fallen for some less than tasteful decorator trends at times, but who designed that hideous thing and thought it would sell? (I know, obviously it did!🤣)
Thank you so much for sharing! I found a roll off dumpster near me last week and ripped out a whole part of my house to make my master bathroom bigger, and I want to save money and paint my cabinets and sink myself so your tips are so helpful!