 So I’m flipping through my old blog posts … yeah, I do stuff like that, don’t hate me … and realized this post had the most boring of blog post intros ever. Like in the history of time … well, make that Internet time. I always try to add in some ‘cheek’ (oh how I wish I had an English accent. Or could fake an English accent that didn’t sound like the Queen Mum). Previously, this post started off like a lecture. A very boring lecture. Hence this new overly chatty intro …
Now Professor Blogger will take over. Try not to yawn too much. The information is solid.
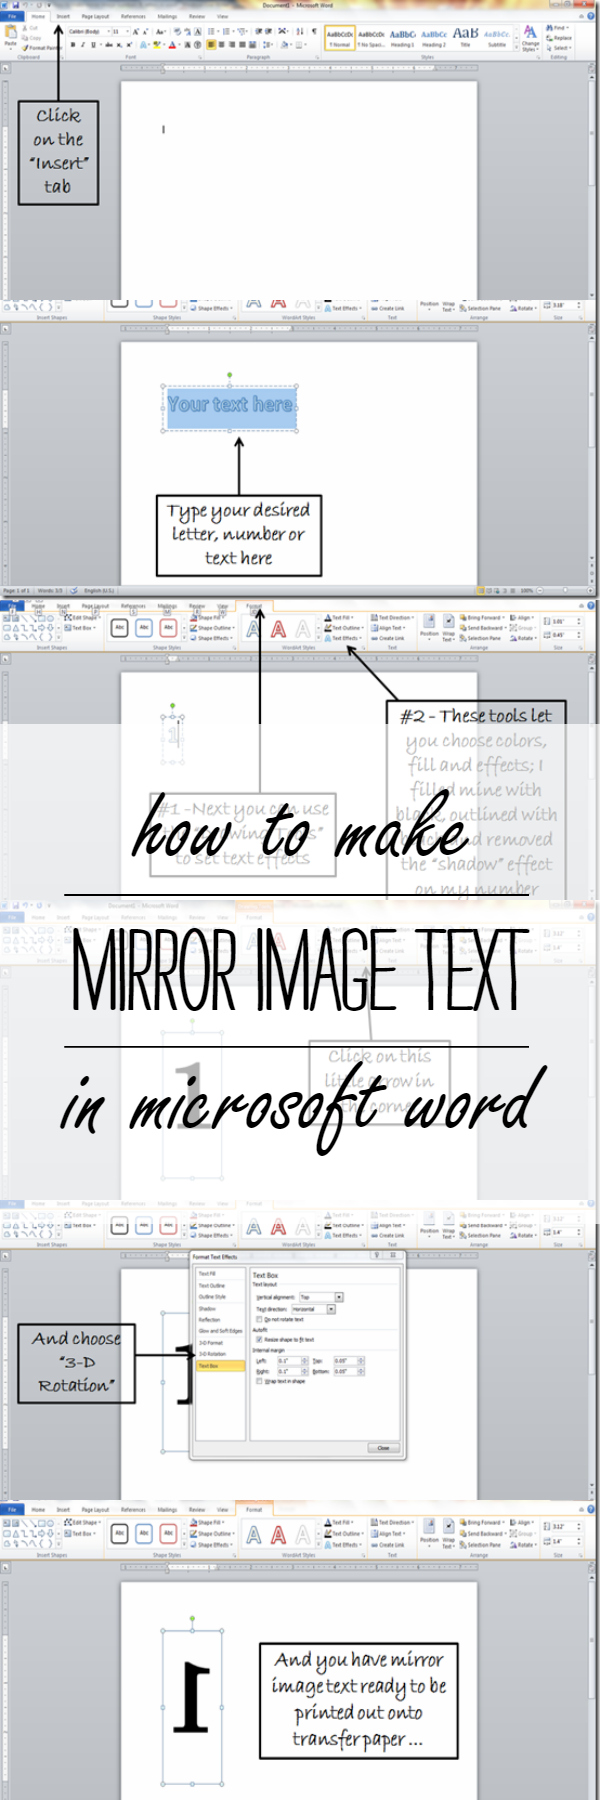
If you want to iron-on transfer numbers or words onto pillows or fabric or clothing – or whatever project you might have in mind – you need to start with mirror-image text.
Here’s my step-by-step tutorial on how to make mirror image text in Microsoft Word using WordArt (I work with Word 2007 and/or Word 2010, depending on which laptop I can wrestle away from the kids).
Start by opening a word document, and then follow along with my screen cap instructions …


![]()
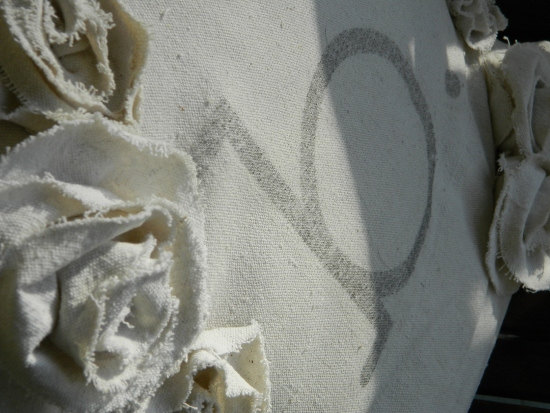
I used those mirror image numbers to make these numbered napkins ...

Pin it from here for future reference …
![]()
You Might Also Like:
How To Make A Monogram Pillow with Mirror Image Transfer

Very cool!! Thanks for sharing this! I ♥ word!! 🙂 Visiting from Home A2Z!
Thanks for this! Was struggling to figure it out. Your step-by-step screenshots and tips were extremely helpful! Thanks!!
Oh, you saved me! Thank you so much for this. It was very easy to follow your step-by-step screenshots.
This information is truly awesome!
Thank you sooo much!!!
Thank you so much for taking the time to create this tutorial..i was pulling what little hair I have left out! Thanks again! From AZ..
I cannot express to you how thankful i am for finding this post and for your wonderful instructions!!! after two hours and muliple attempts i had all but given up on making a simple label!!!! project complete and sanity regained!! thank you !!!
This was so informative. Thanks so much
I have Word 2007 and these steps didn’t work,,,but were enough to get me started on how to figure it out! Thanks!
Oh my god, thank you! I had started to give up. Nothing on the Word help list. Nothing elsewhere on the web. The text direction doesn’t allow reversals. The flip horizontal is disabled. FINALLY, this worked!
Thank you, thank you, thank you. Your tutorial helped out so much. I knew it was possible to do it there but, didn’t know how. Now back to my project. Thanks again.m
you just saved the day! been trying to figure this out for over an hour, so happy to stumble on your post – it worked like a charm! thank you thank you thank you!!!!!!!
AWESOME, for the first time with your step by step instructions I was able to understand and do it right! SMiling all the way now!!
Thank you, thank you, thank you!! This is the only set of instructions that I was able to understand and actually carry out. You made my day!!
Ok, so I DO Have a British accent and I’m so stoked about your post right now! I’ve been playing around with this for 10 minutes and finally found you. Thank you from the bottom of my British heart!
Thank you for helping me through this project it was so late at night and I couldn’t find the solution until I came across your beautiful step by step illustration.
OMG you are a GOD SEND! Seiously NO OTHER site, you tube video etc made this so easy. I was in tears I was SO stressed trying to figure this out, I was almost ready to give up. YOU MADE IT POSSIBLE!
So happy to help!!!!! 🙂 Linda
Thank you for explaining how to mirror image text! I had called Microsoft and they told me in order to do it, I would have to purchase 2013 Word (I have 2007). Thanks to you :+) I can now do it in 2007!! Mine was a little different at the end but after I flipped it vertically, it worked! My head is spinning with projects. THANK YOU!! :+)
So happy to help!!! I still go back and reference that tutorial myself!!! Though, I’m using a more current Word version so it’s a bit different for me now too. I may need to update this post again!
🙂 Linda
THANK YOU THNAK YOU THANK YOU Two days and many hours of instructions by people who do not have the slightest idea of what they are doing and finally YOU, MY MOST ESTEEMED person of the month showed me how to do this. You are an angel THANK YOU THNAK YOU THANK YOU
You are so very welcome!!!! I think this blog post of mine is my favorite because I get the very best comments on it! Like yours!!!! So happy to help! 🙂 Linda
You have saved the day! I was trying to do an iron on image and i’d pretty much given up…thanks to you i can do what i’m trying to do. i appreciate you sooooo much!
Happy to help! 🙂
Super useful ! thank you
having a hard time flipping my image. saw your blog and it help me. thank you! 🙂
Thank you! I have the Surface 2 RT version of MS Word. I figured out how to modify your directions and find the 3D rotate option.
thank you so much. i’ve tried other sites and they were not helpful at all. this is very easy to do.
Seriously you were the only one who helped me out, THANK YOU!
So happy to help! 🙂 Linda
If you wanted a paragraph with reverse text you could insert a text box with your text in it. Then follow the instructions from Linda and reverse the text box as well. Word is not very forgiving as other programs do apply specific text effects.
I am using my lap top with word I believe 2010 and I don’t have format after the view.
I currently have Word 2013 so hopefully this will help:
1. After you insert your Text box (and type in desired text), click on the “Drawing Tools Format” tab up top. (Make sure you are clicked on the text box or this option won’t appear; this holds true for all the following steps.)
2. My text box automatically added a outline around it for some reason. I clicked on “Shape Outline” and chose “No Outline” to get rid of it.
3. Find the “Word Art Styles” box and click on the little arrow in the bottom right corner of that box. A “Format Shape” sidebar box will pop up on the right hand side of your screen.
4. Choose the “3-D ROTATION” option.
5. In the “X Rotation” box type in 180. Your text will flip.
4. Your done!
I hope this helps! 🙂 Linda
thank you!! i even tried you tube videos and none of them would play. You saved me a huge headache! LOL
thanks again 🙂
God Bless you!
So happy to be of help! 🙂
Thank you for this tutorial. This was very helpful information. I looked at a couple of others first and this was the one that made the task very easy! It is so kind of your to share your expertise.
Very helpful. But may I suggest an easier solution for mirroring text? It’s not in Word per se but it can be used for Word. Check out http://mirrortext.info/ You can just type your text in there and paste it back into Word and voila it’s mirrored! Only seems to work well for lowercase letters though.
A BIG!! Thank you!
Your tutorial was a Huge help. I was going to try and print them from another site but, yours helped me to add to my own knowledge of what to do on a computer. Thanks so much.
Thank you!!
You my dear, are an absolute angel! I have Word 2010 and this worked perfectly! Now I will be able to print out some much needed quilt labels. Thank you a million times over!
So happy to help! And so happy that my tutorial from so many years ago still works!
You are an amazing helper/teacher…..thank you so much