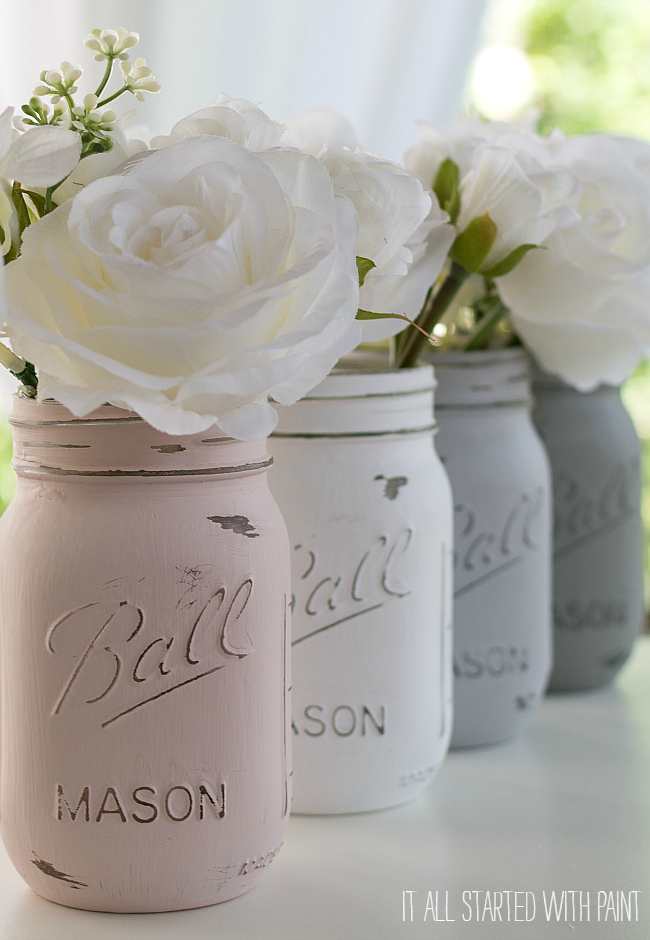
Detailed tutorial on how to paint and distress mason jars.
For those of you who are regular visitors here at Paint (thank you!), you probably scratched your head when you saw the ‘how to paint and distress mason jars’ title of this post in your newsfeed. Or inbox. Because you know I’ve been painting and distressing mason jars … and selling painted and distressed mason jars … for 2+ years now.
But what you may not realize is after all those years of painting and distressing mason jars, I have never once shared a full, picture-filled tutorial with my how.
Crazy, right? How could that possibly be?!?
So just for today, my regular readers (thank you again!) will need to bear with me as I rectify this horrible oversight. This abomination. This slight on mason jar craft-dom.
🙂
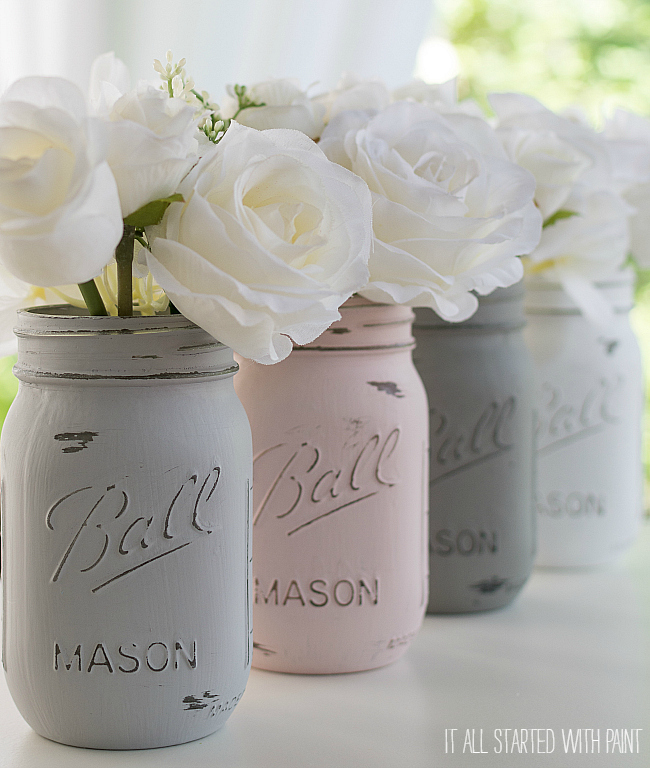
How to Paint and Distress Mason Jars

Materials*
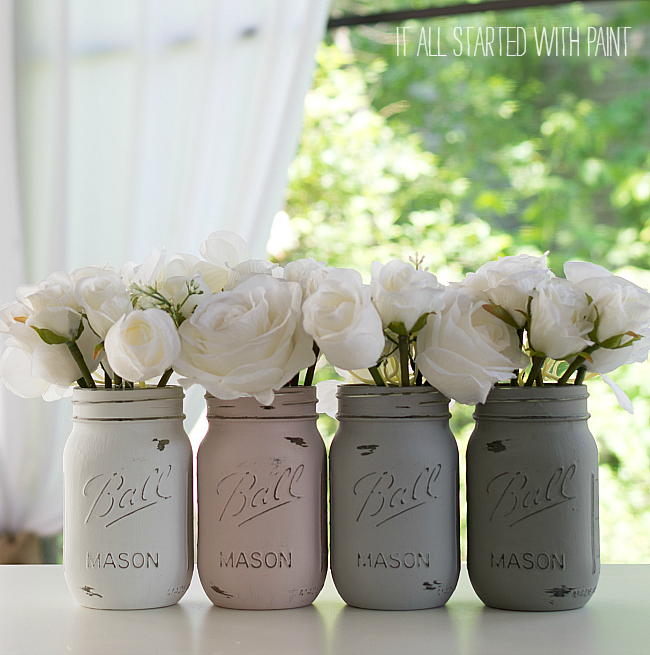
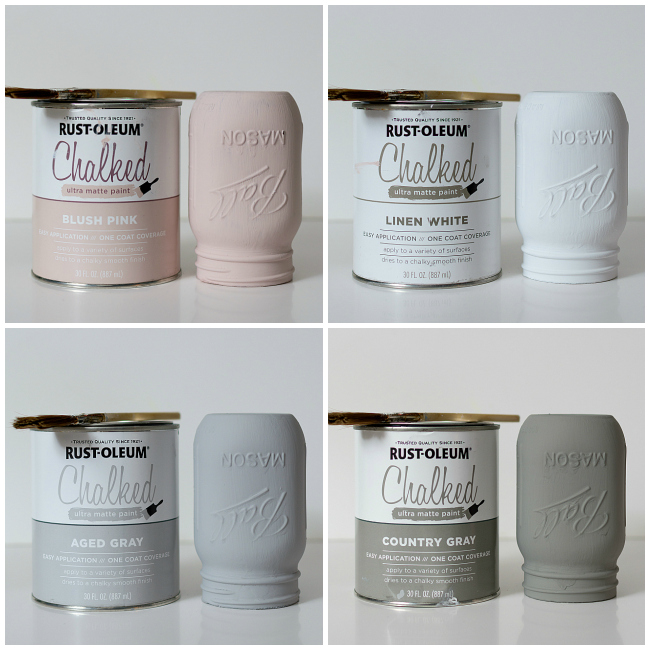
Rustoleum Chalked Paint (Linen White)
Rustoleum Chalked Paint (Blush Pink)
Rustoleum Chalked Paint (Aged Gray)
Rustoleum Chalked Paint (Country Gray)
Rubbing Alcohol
Paint Brushes
*some affiliate links have been included for your convenience; affiliate links will not affect the purchase price of the products for you.
1. Prep
If you’re starting with a new case of mason jars, you’re good to go. But if you’re using old jars that have been used for other purposes, you’ll want to give them a thorough cleaning.
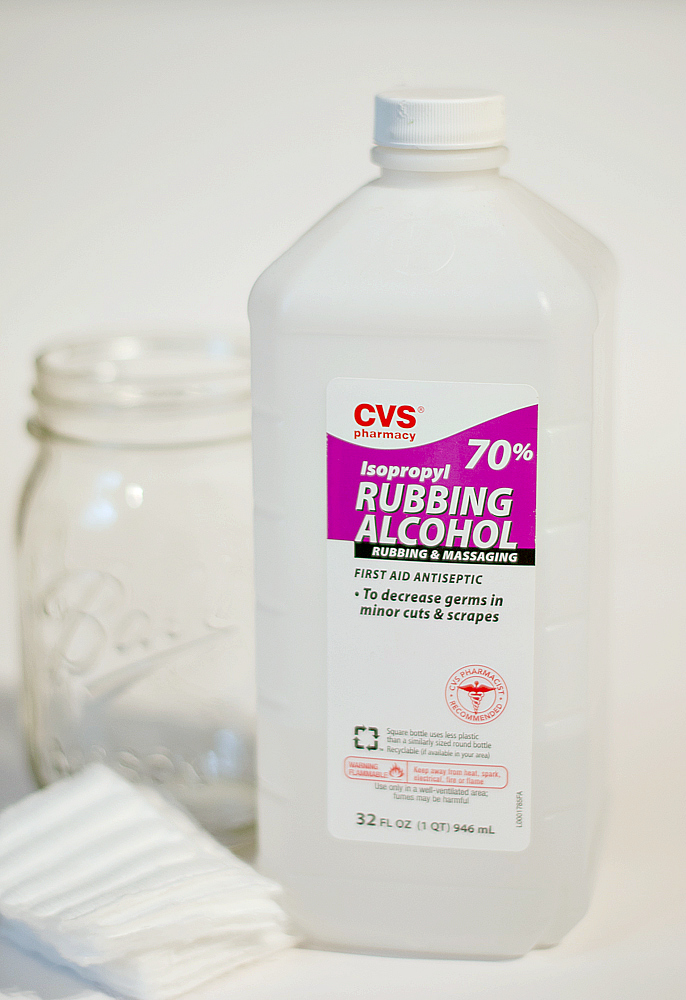
Wipe down with rubbing alcohol and then wash with hot, soapy water. Dry completely.
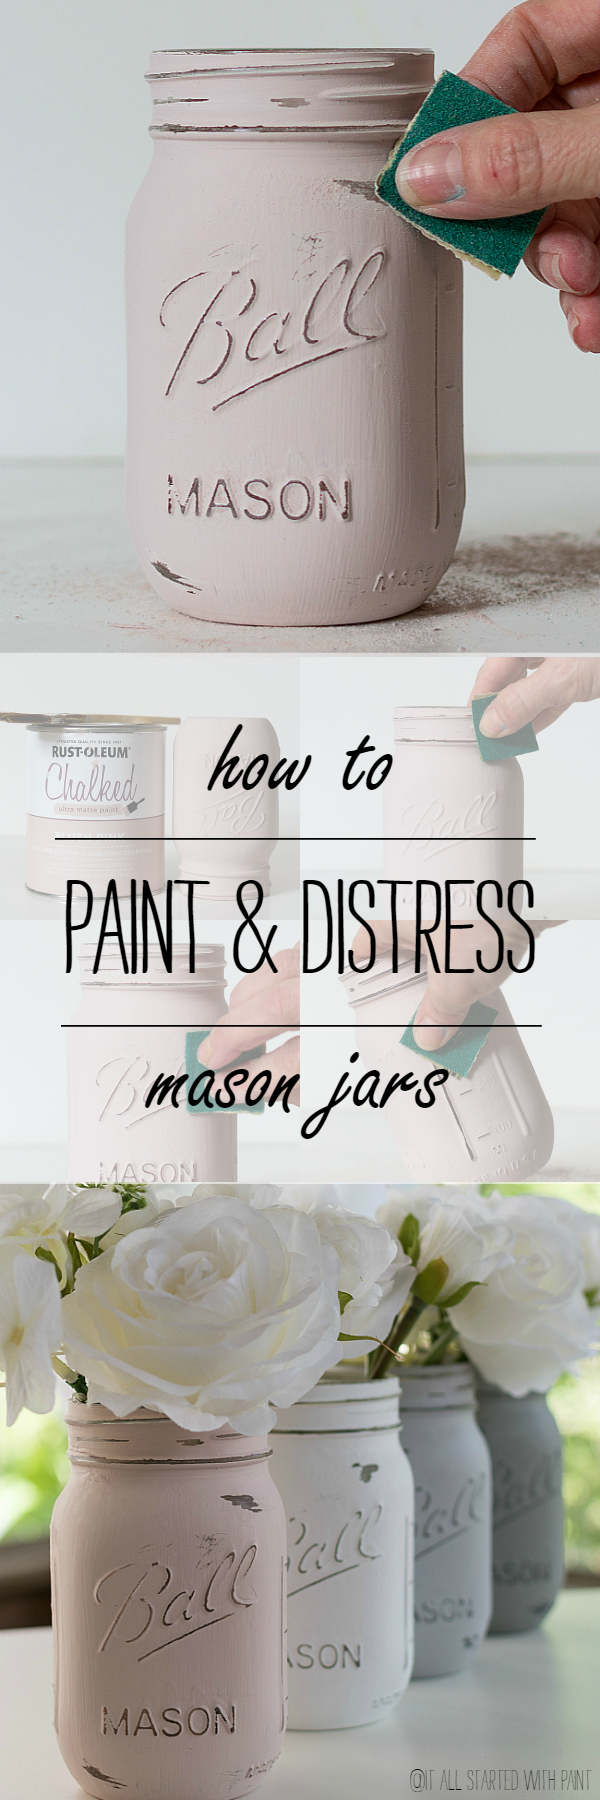
2. Paint
Start with two coats of paint. Let paint dry completely between coats.
My favorite paint medium to work with is chalk paint. It’s easy to work with. It offers great coverage. It adheres well to the jars (much more durable than other paint mediums). And it’s a dream to distress. The only issue is chalk paint can be expensive and hard to find ….
until now!
Rust-Oleum has recently introduced a Chalked paint line (thanks Rust-Oleum for sending me this amazing, affordable, and beautifully colored paint line to try out). The cost is half of the popular name brand who will not be named here. And you can find it at the major home improvement retailers. You can also find them on Amazon (see the Materials list links).
{And if you’re using acrylic paint for your project, give the jars 24 hours dry time between coats of paint; otherwise when you apply the second coat it might peel off some of the first coat paint}
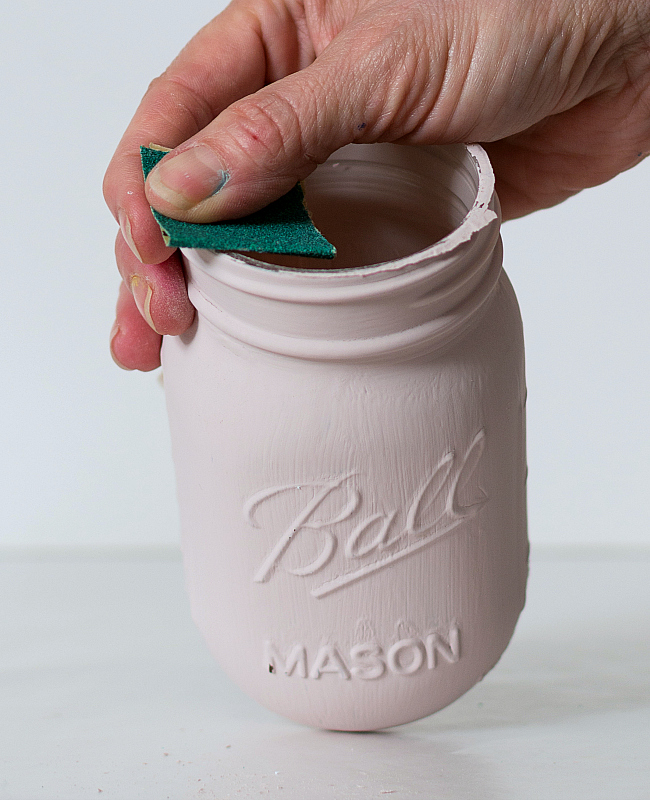
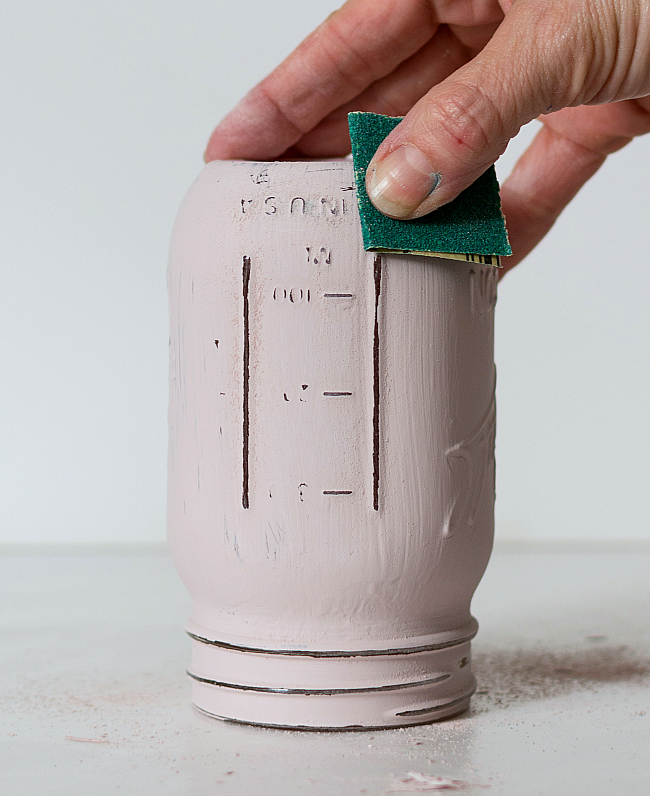
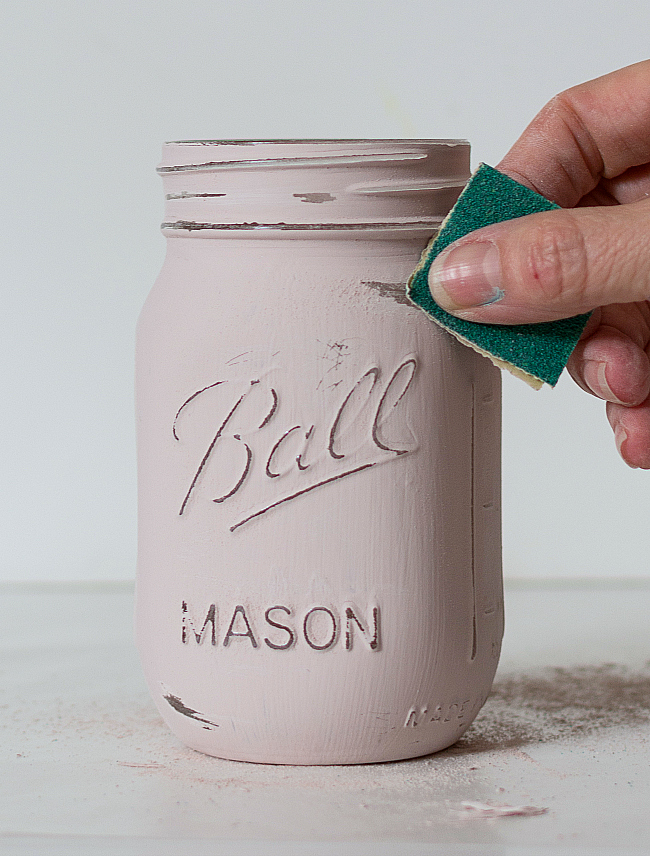
3. Distress
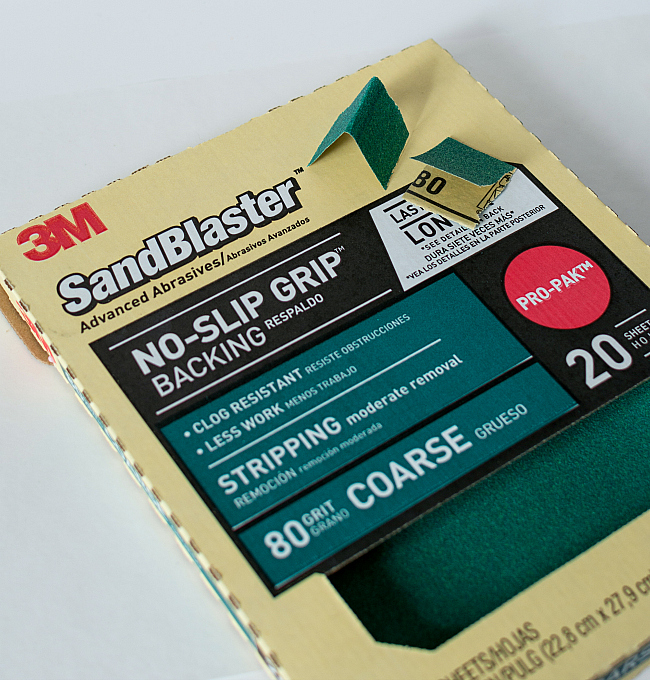
I use 80 grit “No-Slip Grip” sandpaper that I cut into rectangles and then fold over, giving me two side to work with.
I start with the top rim.
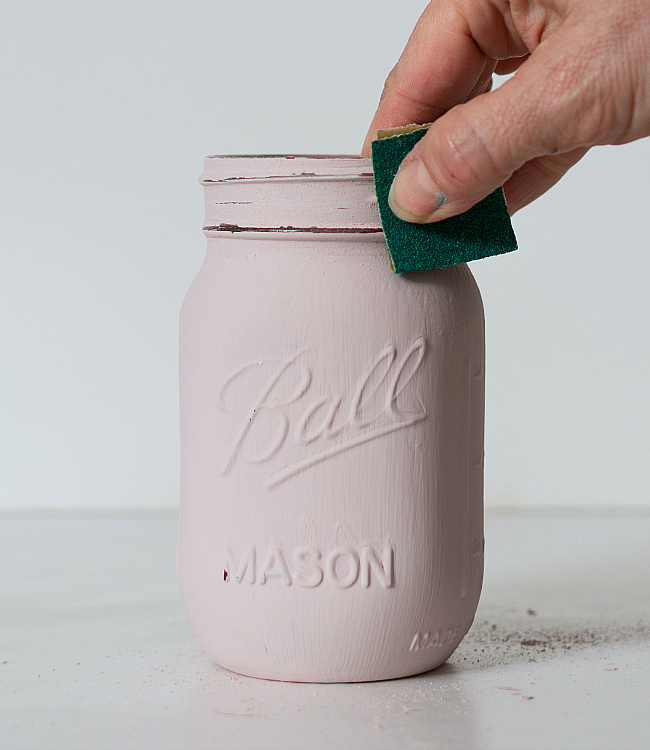
Then distress along the threads.
Next I tackle the raised edges on the two sides of the jars.
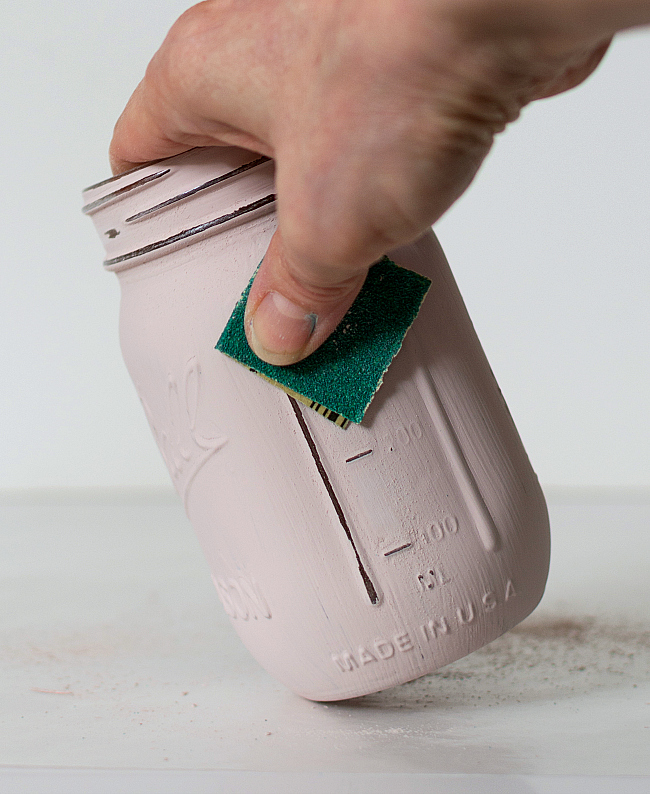
And don’t forget to get the Made In USA text!
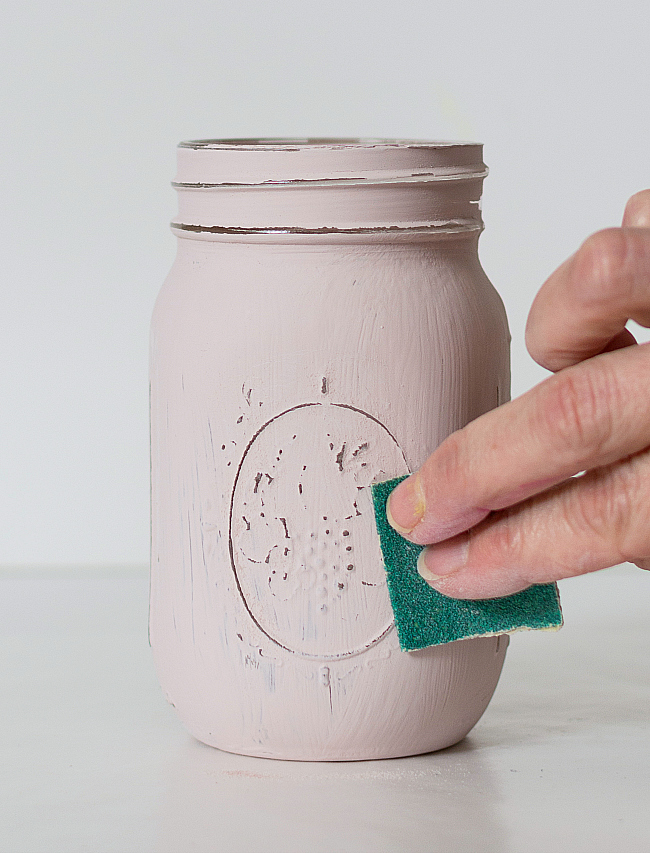
I’m pretty rough with the back. I just rub the sandpaper all over the fruit graphic.
I leave the best for last: the front of the jar. I tend to be a bit more careful here.
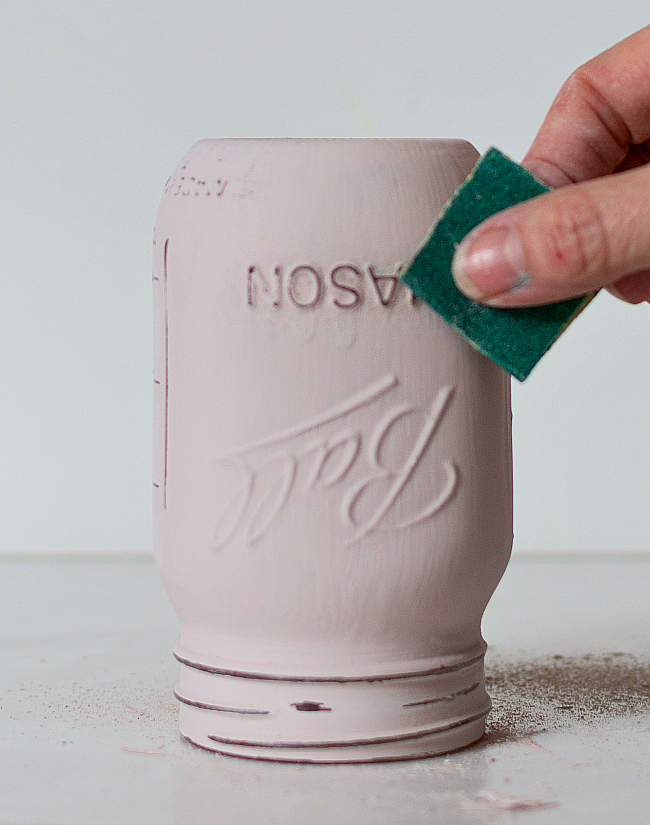
I take care to make sure mason and Ball are completely visible.
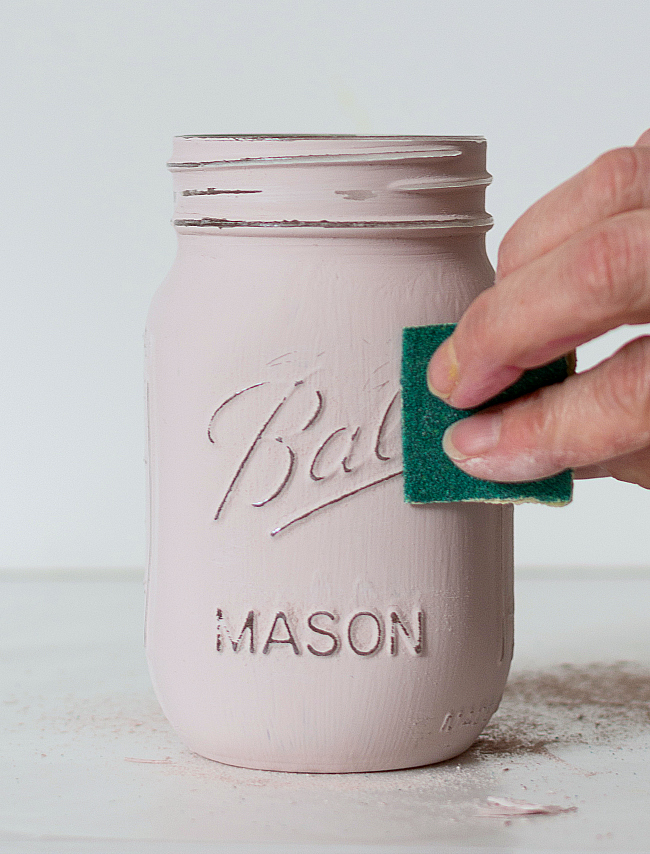
I finish with a bit of distressing along the top and bottom of the jar.
4. Seal
The finishing touch is sealant. My go to is an acetone based clear coat in matte finish.
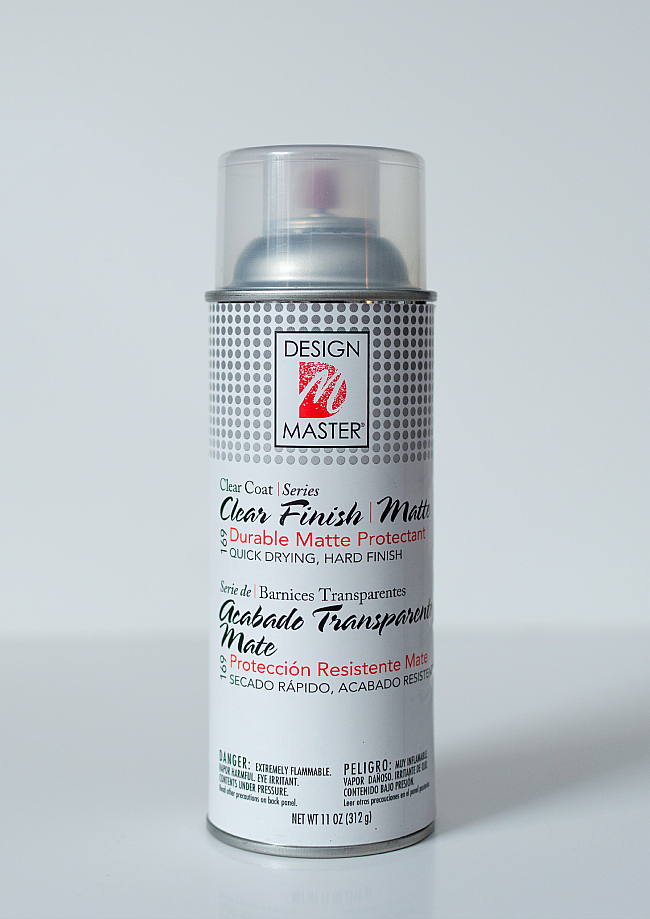
I found this particular brand at Michaels.
5. Care
Don’t submerge jars in water or put in dishwasher. Simply wipe down. And take care when filling with water. While the sealant makes the finish much more durable — and the chalk paint offers a much, much stronger bond that’s near impossible to scrub off than acrylic paint — it’s still considered a semi-permanent finish.
If you are using acrylic craft paint on your jars, you can easily wash off the finish (pre-sealant) with hot water. Post-sealant, some of the paint can peel away if the jars sweat or are submerged in water.
And you’re done.
Now, if you’re not crafty and would prefer to purchase painted and distressed mason jars, I have a few variations of this set listed at my Etsy shop.
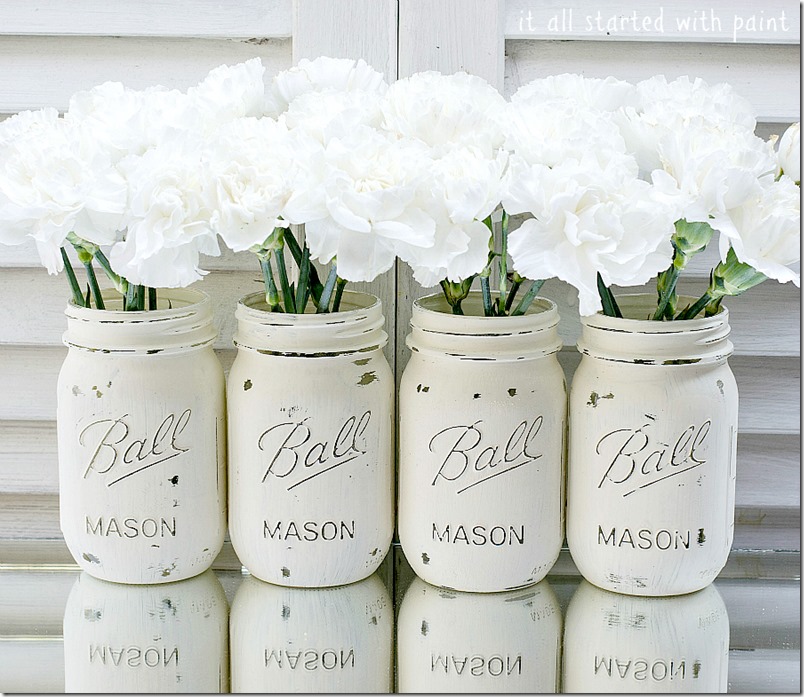
The set of four can be found here.
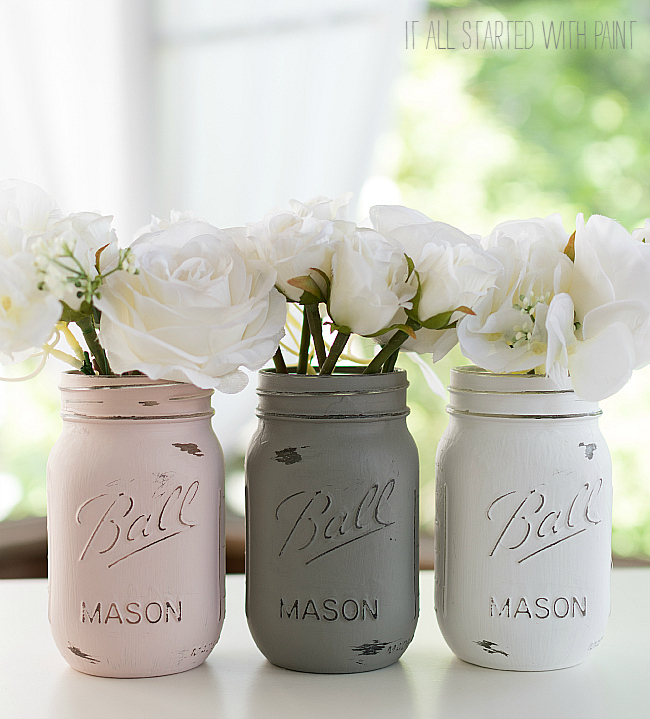
The set of three pink, gray, and white can be found here.
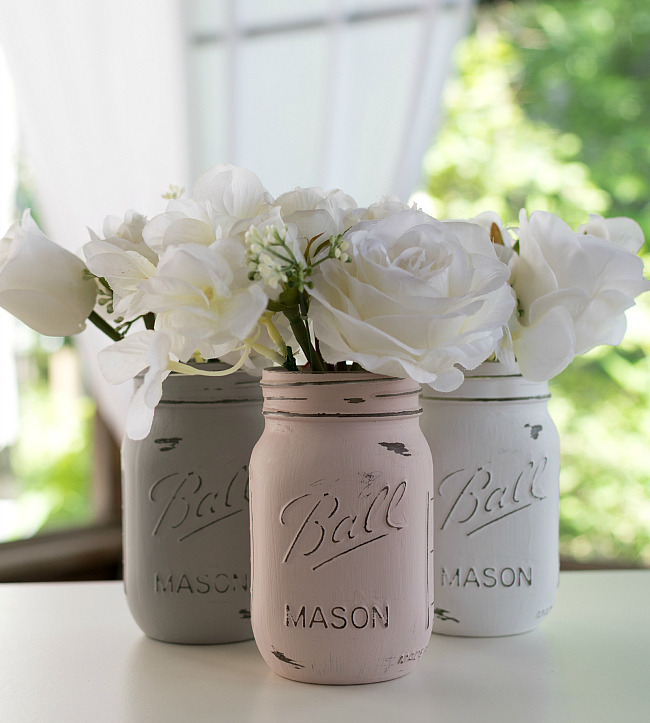
And a set of three with pink, greige and white can be found here.
Did you feel that? That shift in the universe?
Because with this blog post, now everything is right in the world of mason jar crafting …
🙂
You Might Also Like …
Acrylic Painted Mason Jars for Spring (click here)
Annie Sloan Chalk Painted Mason Jars (click here)
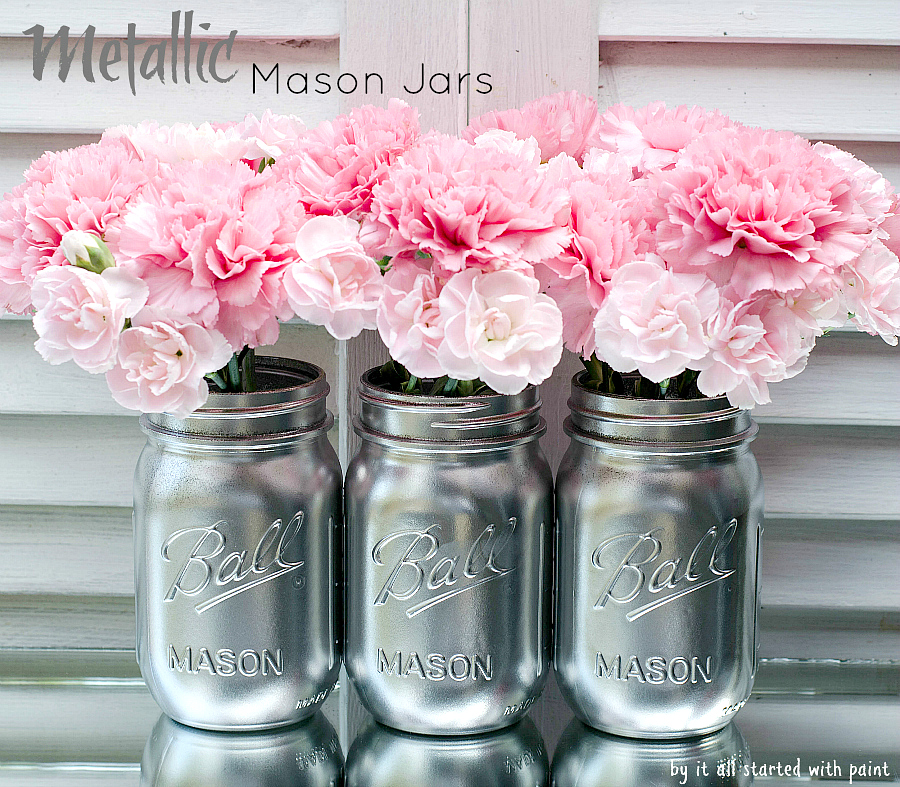
Spray Painted Metallic Mason Jars (click here)
You can find even more of my mason jar crafts projects by clicking here …

And I even have a whole blog dedicated to mason jar crafts called Mason Jar Crafts Love. Click here …
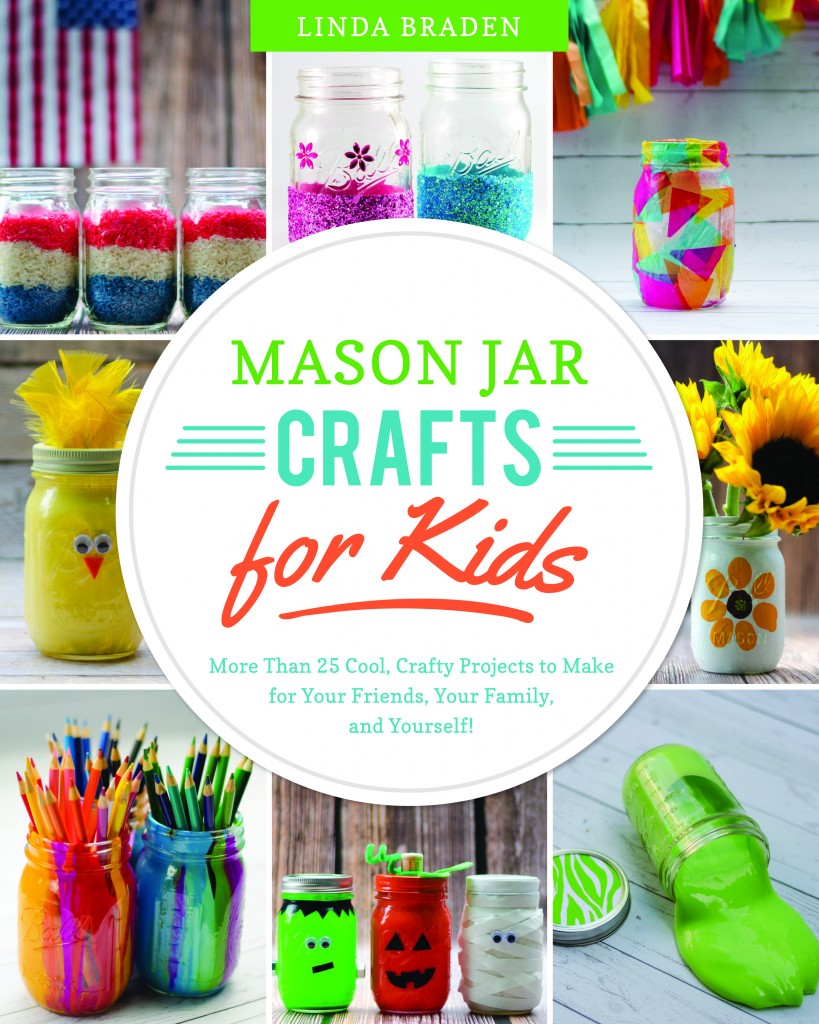
And I have a book filled with mason jar crafts for kids. Click here for more …
Thank’s so much showing what do with jar’s .So many ways out there do it the way you want them to look.
These are so pretty!!!
Yes they are aren’t they
Do the jars come with those incredibly gorgeous white roses? Oh they are so pretty. I’m not usually a rose lover, especially not red roses, but those white roses are breath taking. Are they from your yard?
Great tutorial, love how they look. Will have to get some jars to paint. Love that chalk paint. Gotta go for now. Hope all well at your house? Happy week
Of course they are stunning- I love them!!!!! Super excited that I can find chalk paint more readily available – aside from the tiny little sample jars. YAY
I make mine. Gives you a much wider selection of colors and it’s way cheaper
Agreed! But you’d be surprised at how many people order jars from my shop! Perhaps it’s time. Perhaps it’s the absence of the crafty gene. Perhaps they don’t want to commit to a full case of mason jars! Who knows, but I’m not complaining! It helps with those college tuition bills! 🙂 Linda
If you mean that you make the chalk paint would you please share how? Thanks!
No, I don’t make the chalk paint. I purchase it. You can actually find small jars of it at Michaels too. Americana makes a brand that is affordable and packaged in small containers.
Have you ever used the rust oleum chalk spray paint on your jars?
I haven’t but others have had success with it. I find spray paint can be tricky (especially when you live in a 4 season area). That’s why I go with the quart jar.
Plaster of Paris plus your left over house paint (Interior) or any paint will work. The directions are on the back of the carton
How do you make it?
I love Mason jars! Thanks so much for the tutorial!
Great tutorial and the end result is absolutely stunning! Thank you for sharing!
I love mason jars in all forms, these are really nice, of course the roses re beautiful, bet they smell so good!! Would love to have you join us for OMHG WW this week!!
Off to check out all the other mason jar ideas!
Have great day!
Karen
This is exactly what I was looking for! THank you for sharing with this beautiful tutorial! Your jars look so pretty, can’t wait to make some for upcoming baby shower!
Oh forgive me Annie Sloan, but I have been looking for a more readily available and not to mention affordable chalk paint! Thanks for the tutorial Linda!
Make your own chalk paint 2 tablespoons water mixed with 2 tablespoons calcium carbonate and then mixed into one cup flat or latex paint and that’s chalk paint
that’s awesome… so easy! thank you!
giving away the secrets!! how generous of you. I have said it once, i’ll say it again, NOBODY does a mason jar like you! hope you are having a great week. i am thoroughly enjoying summer break and my kids. trying to stay out of the office and away from projects as much during the summer.
I love this look and it looks easy enough to try! I might try the new spray chalkpaint on the jars. Yours look great in those colors.
Oohh – spray paint chalk paint! That sounds amazing!!! 🙂
I just bought some! I haven’t tried it out yet, but we’ll see what happens! I got black, so I think I’ll have to do some stenciling.
That sounds like fun! Let me know how they turn out! 🙂
Cat’s outta the bag now, but thankfully it’s a tutorial I can actually follow. Featuring at the Vintage Inspiration Party as well as pinned.
Love the soft colors. Beautiful.
Hello Linda. Thanks for these instructions..i want to try this! Have you also seen on pinterest where you take modge podge and i believe food coloring or some paint and do the inside of jars? Its pretty also
Hi there, I am making these for a business assignment at school and was wondering, are you able to put drinks in them or not? As that is what most of the students would do and I don’t want anyone getting hurt and then blaming me and my team for it. also I really love all your mason jar deigns they are all really pretty.
The painted surface is not permanent and is still water soluble. I find that the chalk paint varieties form a stronger bond, but again, not permanent. The clear sealant helps too. If you were going to use them for drinks, I would absolutely use a straw and don’t paint along the top ribbed band and use then use the mason jar band as a layer of protection from the paint. Does that make sense?
yep thank you so much for that I hope there a successes like yours.
Love these will be doing centerpieces for my daughter’s baby shower.
Thank you so much for your DIY tutorial. Question… Where do you find the Rustoleum Chalked?? I have been to 5 stores (Lowes, Home Depot, Walmart, Michaels and Sherwin Williams) and none of them carry it. 🙁
I even called Rustolem directly and they weren’t able to help me either (as I’m needing this today/tomorrow for a present for my grandmas bday that I’m working on). Any advice? And if you don’t know… Would you recommend any other chalk paint that won’t cost an arm and a leg?
Thanks so much in advance,
Chelsea
I make my own chalk paint. 1/3 cup water mixed with 1/3 cup plaster then pour into 1 cup paint. Any color and brand!!
What a fabulous idea!!! Thanks so much for sharing with my readers! 🙂 Linda
I was wondering how you get the paint so smooth? I used brushes and a foam brush and both left the jars very paint brush streaky… I tried duff stuff and it always came out not smooth like yours…??? Help
I find the chalk/chalky paints give a smoother, matte finish. They even sell a chalk finish paint at the craft stores now in the little bottles. I think it’s an Americana brand.
Hi Linda! Thank you for your reply… I am using that brand American something.. It goes on smooth, distressed great! But there are paint streaks still.. Im in my 6th jar and I’ve used all kind of brushes.. Your jars are perfect! After doing this by your instructions the streaks weren’t addressed for us newbies… It looks like they haven painted, or something. They are just oerfect!
I meant spray painted..
Use a good quality brush, one made for smaller objects and not specifically for chalk paint 😊
If you hold it up to the light you will see streaks. But once you add water and flowers the streaks completely disappear. And if there are one or two I think they just add to the distressed charm.
Thanks for the tutorial! How long do you let the paint dry between coats? I let it dry for about 16 hours, but the second coat is pulling up bits of the first coat.
I try to let dry overnight. And I also try not to handle the jar too much. Sometimes the paint will come off by my fingers (I hold on the sides) but then I just slap a little more paint on it when I put it down. And that’s the beauty of distressing because it helps to hide those painting flaws.
Thanks so much for sharing! This is my next project!
Hi, your mason jars are amazing! I wish I could find them in italy at a good price but I’ve been searching almost everywhere. What is the average price of a mason jar in usa? Would you be interested in sending me some plain clear mason jar in exchange of our italian mason jars (called bormioli-quattro stagioni)?! This might be an old style sell :))))
Let me know! Thanks and keep working on them! They are amazing!
K.
The problem is the shipping cost. It’s upwards of $70 to ship overseas. I know, I’ve checked in the past. So sorry!
All right then! But thank you so much anyway for answering my question! I wish I could buy you crafted jars I love them! ❤️?
Beautiful project. Do you think it’s safe to make these into candles?
Absolutely! But if you’re worried, you could always use flame-less candles too!
thank you sooooo much!!! i can’t wait to try this!!! your steps are clear & simple!!!! merry Christmas!!! glenda
Gorgeous!! Thank you for the tutorial!! Love it!! Question, I tried to Pin this and it did Pin but only the image and not the link. Am I doing something wrong? 🙁
Pinterest changed the way their pins look (I know, it confused me too) and you have to scroll down to the bottom of the image and there is a “read it” or something like that tab you have to click now to get to the blog. I find it confusing! But thanks for the pin! 🙂 Linda
Oh EM G! I didn’t know about this brand! Do you know if Home Depot or Lowe’s sells it? SO PRETTY!!!
I’m not sure if they carry it in the physical store, but I have found it on homedepot.com!
This is so awesome!!! Thank you for the tutorial!! My husband belongs to a group of fellas who ride motorcycles and have a business meeting once a month. The women are not included so last month I suggested a craft night while the fellas are at their meeting. Last month six of us gathered and did melted crayon art. Last night there were 19 of us making paper crafts-cards and bookmarks. Next month your painted jars are on the agenda, I am so excited!! This is going is going to be so fun, I can’t wait to tell them all about our next project!!! Now to find the paint :^)
What kind of brushes did you use?
I use bristle brushes that I find at the craft store. They have a straight edge and are 1″ wide. The brand is Craftsmart and I buy them at Michaels.
Did I totally miss it or can someone tell me about how much paint to how many of the pint jars?
I saw 2 coats of paint but I don’t see the amount of paint.
Thanks you!!
I’ve never measured out how much paint. Honestly, I have no idea how to do that! For acrylic paint, I use those small jars you find at the craft store and can probably paint 10 or so jars per tube. I think? Honestly, never really paid attention to it! So sorry!
Unfortunately, this paint is not half the cost of Annie Sloan’s paint :((( I just bought some of that paint and thought, MAN this is too much so I’m looking for an alternative. But the retailers around me sell this Rustoleum product for near the same price. :'((( {I HAD SO MANY PROJECTS I WANTED TO DO TOO} ^sad panda
Oh no! I’m so sorry about that! That makes me sad too – I was looking for an affordable alternative to ASCP! I’ll have to look online for options.
I love this post! Had to try it myself. I was successful painting the mason jars, but when it came to distressing, I had a hard time just distressing the letters. Seemed like I was over-distressing, thus scuffing the area around the letters. Could it be that my mason jar letters are different? I have the Canadian version of the mason jar 😉 Or do you have any other suggestions of how I might avoid that?
I’m not sure about the Canadian version of the jars. I do notice that sometimes the jars have less raised letters than others. Like it’s a batch to batch thing. Have you tried using a small piece of sandpaper? Or a finer grit paper.
How do you make chalk paint?
Mix 1/3 cup of plaster of Paris and 1/3 cup of cool water; stir until completely smooth. Mix that with 1 cup of latex paint and stir thoroughly. This will make enough chalk-finish paint for one coat on a six-drawer dresser. Chalk-finish paint should not be stored and reused.
Do you have any preference when it comes to they kind of sandpaper you use?
I prefer an 80 grit from 3M. Especially the no grip variety.
They are beautiful! I am having a hard time distressing – the paint won’t come off! I used acrylic paint. Any tips?
Hmmmm … perhaps a coarser grit of sandpaper? I typically use 80 grit.
Thank you. I finally got it distressed but my arms got a workout! LOL
I think next time I will try a coarser grit, But I’m also thinking maybe my coats of paint were too thick….. I’ll try again – I love the white to gray ones above. Fantastic!
I love your tutorial these Jars are so cute. I was wondering if i’m using this Rust-Oleum paint can the jars be baked to cure them like when i use the Martha Stewart Glass and Craft paint?
No, it’s not safe to bake them. The chalk paint does create a really, really strong bond with the glass. It can be scratched but near impossible to wash off completely! It’s one of my favorite mediums to use on mason jars.
How many flowers do you put in each jar? Hydreagea or peonies?
Those are fake flowers I found at Michaels. It’s a mix of faux roses and hydrangea piece – not a full hydrangea.
I tried painting pint mason jars following your advice and yuck. I ended up throwing out a whole dozen jars because they looked so bad. I purchased and used everything that you recommended in your directions. I knew there had to be a better way to get paint to stick too glass and I found it.
Use Rust-Oleum Frosted Glass spray in Semi-transparent finish first on your jars to coat them. This gives the paint something to stick too. Let dry and them spray jars with Krylon chalky finish spray paint. You will have to do two coats of paint. The finish is so smooth and tough that you can’t even scratch it off with finger nail. I didn’t use sandpaper on my jars to distress but you could do that. One can of the frosted glass spray will cover about 36 jars. One can of spray paint will cover about 24 jars because of the two coats. Darker colors will cover better.
Are there any companies now that make small bottles of chalk paint?
Yes, you can find them at the craft store. There are quite a few chalk paint options in small jars. Check them out at Michaels.
I was wondering with the chalked paint, I wanted to do the mason jar a dark blue but there isn’t a color for the kind you used. But there is a dark blue in the same company and same kind just in a spray paint thing. Would i be able to use that and still make it look the same?
There are a lot of new chalk and chalky paint color options at the craft store. At Michaels, I saw a few brands (Americana, FolkArt, Martha Stewart and another one I can’t remember the name of) offering chalk and chalky paint options in a wide range of colors. Also, Amy Howard has a line of chalky type paint that you can mix to whatever color you want (though, the Amy Howard brand can get pricey). You can also use craft paint (just make sure you use the matte finish – not enamel or multi purpose. You can also use spray paint too, but the spray paint tends to be glossy. However, I’ve heard that there are some chalk paint spray paint from Rustoleum but I haven’t tried them yet and don’t know what colors are available. I hope that helps! 🙂
yes it did, thank you!
Do you paint the bottom of your jars?
I do! And then turn them over to dry.
Hi i was just wondering, if you put like a candle in these when there painted does it show and give a glow or does it not really shine through? Thank you
I think it would show through. You could add more distressing if you wanted to see more light from them too.
Hello, thank you for a great tutorial, I am doing more and more with chalk paint and really enjoying it! I have referenced your tutorial in one of my blog posts, thank you for sharing!
They look great! I have a question though. I noticed on some you can see the paint brush streaks. I have read to take sandpaper to the glass before painting to minimize this. I painted glass before and didn’t sandpaper it and I hated the paint brush streaks. What’s your thoughts on that? TIA
I don’t mind the streaks. I think they add to the rustic charm. And once water is added you don’t even see them anymore. I’m not sure about he sandpaper to the glass idea but if you want a true streak-free version then spray paint is the way to go. It gives a solid finish. 🙂
Hey! Your mason jars are so beautiful!! Can I ask what size jars these are?
Thanks! The jars pictured are the pint sized ones (16 ounce).
I’m painting my mason jars like yours and had a question. I’m using chalk paint and I want to seal mine. I will be filling the jars with wax and wicks and putting in the shop to sell. My question is the sealer that you use have to be a certain brand? Also once the candle is burning and the jar is getting warm will it be a problem with toxic fumes coming from the sealer?
No, I don’t think the sealer has to be a certain brand. However, I’ve tried a few different ones and some can cause discoloration. That’s why I use the one I find at Michaels (Design Master) because it doesn’t cause any change in color.
As for the candle burning & toxic fumes, I really don’t know. I haven’t tried that. Sorry.
Hope I was helpful?
🙂 Linda
Thankyou Linda. I think I will order a can over the internet.
Suzanne
how many jars will a can of paint cover? I plan on painting a lot of them for a project, but not sure how many cans to buy….!
I’ve honestly never done a can-to-jar analysis! So sorry about that. But the paint does go a long way so I would start with the smallest amount first and then buy more as needed.
How many jarsdoes one can of paint cover?
I’m honestly not sure. I’ve never counted it out. But the chalk paint does go a long way. Sorry I don’t have a better answer! 🙂
If I wanted to put black polka dots on the jars would you recommend acrylic paint..
Absolutely! Acrylic paint would work great! 🙂
Can you use Rustolium chalked spray paint? Love your jars!
I haven’t yet used the chalked spray paint but I know of others who have successfully! And thanks so much! 🙂
Do you mix water in your chalk paint that you buy from craft store?
So sorry for the late response! When you first open the chalk paint you don’t have to add any water. But the longer it sits around after the seal breaks I find that I do start to add water.
is there a way to paint these mason jars such that it’s still safe to store food in them? thanks!
I’m not 100% sure. However, the paint is on the outside of the jars, though. So that should prove an issue. I’m more concerned about clean up. The paint is not permanent so you can just scrub the jars clean or put them in the dishwasher or you’ll ruin the finish. Hope this helps!
I LOVE these jars.. I’ve been making some with matte spray paint.. have you tried it also with matte spray paint and If so what is the difference for you personally? Also will that sealant work on spray paint and will it help the bottoms of the jars? I made me a bathroom Set and after awhile the bottoms chipped off from water.. I wish I could show pictures of mine I just made!! They are super fun make.. I might want to sale them but I need them perfect before I do.. 😁 Thanks
I haven’t tried the matte spray paint yet. And I would absolutely seal with a clear coat. While that won’t guarantee you won’t have issues int he bathroom, it will help. Unfortunately there is no permanent paint for glass. However, I do find the chalk paint products form the strongest bond (vs. acrylic and latex).
I love your mason jars and thank you so much for helping me the directions helped so much!!! I found the matte protective topcoat in the rustoleum brand. I wasn’t sure if it had more or less protection? Thank you again
I think many are the same. I have a hard time finding matte versions (and some that I do find tend to be too glossy for my taste) which is why I stick with the brand I do! I’ve had mixed results with Rustoleum and found it discolored some of the paint colors. And the dry team seemed longer than with my Design Master brands.
These are so lovely! What kind of brush can you recommend? I have used both bristle & foam brushes, but I still see the strokes after 2 coats. Thank you.
I use bristle brushes. And two coats of paint. Chalk paint offers more opaque coverage. But I still use acrylic paints too which I can see some brush strokes if I hold them up to the light but once I add water and flowers you can’t see that anymore!
I love this blog! I just happened upon it today and it’s nice to see that it’s still active and thriving. I would love to purchase a set that I want to use to decorate a baby shower, but I’m up against a time frame and need specific colors, so I’m going to try this myself. Fingers crossed they come out as beautiful as yours. I do have a question. What size jars did you use, and would an 8oz bottle of chalk paint do or will I need to buy an entire can?
I use the pint size jars. Not sure how many jars you plan to paint with the 8 ounce jar so can’t help! But I would start with one and see how it goes from there! Thank you so much for your kind words! 🙂
Hello! When I applied a second coat of paint the next day, the first coat began peeling off as I was applying the second coat. Any thoughts as to why? Thanks!
I find that it can sometimes begin to peel where my fingers touch the jar so I I only hold it with a thumb and middle finger (one on each side) to minimize the peeling and then when I turn it over for drying I touch up those peeling spaces.
Would distressing the top edge work if you were going to put lids on or should you tape that and not paint at all. I want to use the jars for dried herbs so must keep airtight. Thanks.
I think not painting the threads would be your best bet for a tight fit. So yes, tape it off.
How many oz are the jars in the photo?
They are the pint size jars which I believe are 16 ounces.
Thanks for the tutorial! I tried this using small glass milk bottles and a homemade chalk paint. (4 tbsp chalk, 4 tablespoons water, and about a quart of paint). Let it dry for a day, and when I tried to distress, it just peeled the paint right off the whole jar. Did I not have enough chalk you think? Thanks.
I’ve never tried with homemade chalk paint but am guessing it’s not suitable for painting on glass. The store bought chalk paint actually adheres really well to the jars. Stores like Michael’s sells small jars of chalk paint (in same sizes as the craft acrylic paint) at affordable costs so you no longer have to commit to a full pint size jar.
Hello, typically how long should I wait after painting to put on the clear coat? This post made everything so efficient and so far they look so good!
If you’re using chalk paint you could clear coat the same day because it dries so fast. If using acrylic paint I like to give them overnight to dry before sealing. And I’m so happy the tutorial has helped! 🙂 Linda
These look beautiful and I can’t wait to try them out! One question I had.. do you paint both the inside and outside of the jar?
Thank you! I only paint the outside of the jars. Some have done both. It’s a personal preference. Also depends on how you want to use the jars. If you plan to put water in as a vase, then don’t paint the insides.
Where did you get the flowers you put in it?
They’re faux from Michaels. Here’s a link: http://www.michaels.com/rose-and-ranunculus-bundle-by-ashland-classic-traditions/10408892.html
Do the inside of yours look kinda see-through? Or are you putting on pretty thick coats of paint. Thanks!
Yes, the do look see through when held up to light. With too many coats of paint it will be hard to distress. Once you put water and flowers in them you don’t see the see through!
Can you use the Rustoleoum Chalk Spray Paint?
Absolutely! You’ll get a cleaner finish without the brush strokes.
Gorgeous! 🙂 I have a question. After painting jar upside down from top to bottom (mouth of jar), once dry and after a second coat do you paint rim of jar last? And a little inside jar? Mine are still drying right now from a first coat so I’m not sure yet what rim will look like once I flip it over. (And not sure if maybe I should have painted rim and inside 1st) My plan is to use eith flowers as a vase 🙂 thank you in advance!
I paint the rim along with the rest of the jar and I don’t paint inside the rim. And then I distress along the threads and the rim too.
Love your tutorial. I liked to it in a blog post about mason jars. https://mommysuburbia.blogspot.com/2018/04/mason-jar-obsession-cool-uses-tips-and.html
This may be a silly question, but what kind of paintbrushes do you use???? I want the best coverage possible?
I use the smallest one in this set: https://amzn.to/2qCejyW
Are you painting a lighter color over a darker? When distressing are you sanding to where a darker color shows through or down to the clear glass?
No, I’m not painting a lighter color over a darker. When I sand off the paint, I’m sanding down to the clear glass.
Linda. as everyone else has commented. Your mason jars are beautiful and the colors are WOW! GORGEOUS! I’m just curious…why don’t you bake your jars? Most of the other tuitorials on Pinterest have extra steps and they all involve a clear coat and glue then in the oven? Why do you suppose they do these extra steps if not neccessary. I’m all about saving time but is the result the same between your jars and theirs? Thanks so much in advance!
I honestly never thought to bake them! I don’t see how that would work with acrylic paint (it would just melt and would probably make the kitchen smell toxic). I simply use a clear coat on top and had never heard of the baking part!
Finally!!!! The question I have been searching for!! For when u distress the jars it makes where u distressed look black! Which is exactly how I want mine to look!
I went out and made my own this weekend after following your tutorial..however when I used the sandpaper it made some marks on the paint..they are light in color and look bad :(. Not sure if I should take a detail brush and fix them or what! I might have a different grit so I’ll look into that but I’m so upset after distressing them. Any tips? (other than maybe a lighter grit)
I’m sorry for not getting back to you sooner! It may be a sandpaper brand issue? Not sure. You can always repaint over those areas (or the jars themselves) and try again. I use 3M brand sandpaper 80 grit that I find at the Home Depot and Lowes.
What is the cheapest way to do this?
Acrylic craft paint is the cheapest option (around $1 a bottle or so). You can also buy single mason jars at a Dollar store (and some Ace hardware stores) if you don’t want/need a dozen jars. They typically charge a $1 per jar (though the dozen runs about $9).
I love these! I am going to be making a fall centerpiece with these as inspiration. Which size mason jar do you think that I should use? Which size do you typically use? I cant tell if they are the 16 oz or the 32 oz. Thank you!
These are the 16 oz. I actually have both 16 oz and 32 oz jars in my home. The 32 oz. are best for tall flowers/centerpieces. I like more of a tea rose look in the 16 oz. You can also mix and match which would vary the height of your centerpiece and be an interesting look!
Hello! Just found this old post and have a question. Do chalk painted jars need to be cured in the oven like other types of paint do? Thanks!
~Deb
No, they don’t. Actually, you should never bake any painted mason jars in the oven. Just seal with a clear matte sealant.
the pictures got me. 🙂
My main blogging issue is lack of time (I still haven’t adjusted to how demanding and time intensive one tiny child can be)! I can only use the midnight shift for working, once the little darling is asleep (which means my blog post rate is about twice a month – if lucky! – as it takes me a long time to write each article)…but this is not something you can help with. Just something I need to accept!
Are these food safe for dry ingredients
No, I wouldn’t store food in a painted mason jar.
I know you must be so sick of talking about how cute these jars are, but I have a question. I’m going to try and paint mason jars for my son’s baptism party. I wanted to do an ombre effect from white and the top to navy at the bottom. Any tips? Should I paint the whole jar white to begin with? Thanks in advance 🙂
My apologies for the delay! Yes, I would star with the lightest color first (the white) and give it two coats. Then you can layer on the other colors as stripes, starting at the top and working your way down, from light color to dark.
I know now why you do a different color per jar. The ombre effect didn’t really work, but they were cute anyway!
I’m so glad they were cute! And now I’m feeling challenged to do an ombre effect on a single jar! Wish me luck. 🙂 Linda
I’m not sure if I’m adding comment in right spot, but I’m so glad I found your tutorial of Mason jars, just what I needed. Ty for such clear, precise explanation!!!
I love these jars craft truly!!!
Thanks for sharing this Detailed tutorial on how to paint and distress mason jars, I was actually searching for this one.
I love this how to paint and distress mason jars tutorial, thanks for sharing this one.
Great!!! The pictures literally got me. 🙂
Thanks for sharing this Detailed tutorial on how to paint and distress mason jars. I was actually looking for same one. Actually I love making crafts !!!
Thank for sharing this. I got the picture perfect.
Thanks for sharing about How To Paint and Distress Mason Jars, I was actually looking for same !!!